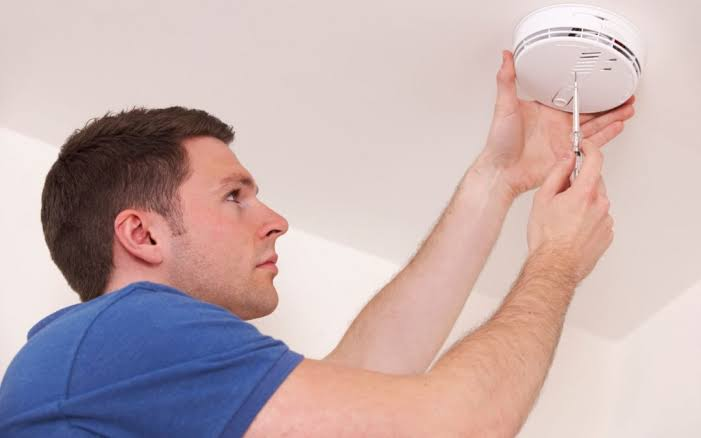
Smoke Detector Placement Strategies That Improve Early Warning Coverage Throughout Residential Properties
A smoke detector only helps if it senses smoke early and wakes everyone in time. Many homes have detectors in the wrong rooms, mounted in dead corners, or missing from the floors where fires start. Good placement is not complicated or expensive. It means putting the right type of detector in every key location, at the right height and distance from walls and appliances, so smoke reaches it within seconds. This guide covers where detectors belong, which technology suits each space, the mistakes that create blind spots, and the upkeep that keeps them trustworthy.
How Smoke Detectors Save Lives
Most fatal house fires happen at night, when people are asleep and cannot smell smoke. Inhaling smoke, not flames, causes most fire deaths, and a sleeping person can be overcome without waking. A loud alarm changes that outcome. It provides the two or three minutes families need to get out, and that time matters more than ever because modern furniture and synthetic fabrics burn fast. A room can become unsurvivable in under five minutes.
Homes with working smoke detectors have roughly half the risk of a fire death compared with homes that have none or have detectors with dead batteries. A detector disabled after repeated nuisance alarms offers no protection at all. Placement matters too: a detector outside the bedrooms wakes sleepers far sooner than one by the front door, and one on every level catches a basement fire before smoke fills the stairwell.
Detector Types and Technologies
Not all detectors sense fire the same way. Matching the sensing technology to the room reduces false alarms while keeping response fast, which is why many fire services recommend photoelectric or dual-sensor models.
Ionization Detectors
Ionization detectors use a tiny amount of radioactive material to detect fast, flaming fires with small smoke particles, such as a pan of oil igniting. They are slower with slow, smouldering fires that produce larger particles and heavy smoke, and they are prone to nuisance alarms near kitchens and bathrooms. A basic unit costs about $10 to $20, but that saving is poor value if cooking fumes keep setting it off and someone eventually disconnects it.
Photoelectric Detectors
Photoelectric detectors aim a beam of light into a sensing chamber. When larger smoke particles from a smouldering fire enter, they scatter the light onto a sensor and trigger the alarm. These units, typically $15 to $30, are better near kitchens and living rooms because they react less to cooking fumes and shower steam. For bedrooms and hallways, where smouldering bedding or upholstery is a real risk, photoelectric is usually the stronger choice.
Dual-Sensor and Smart Detectors
Dual-sensor detectors combine ionization and photoelectric sensing in one unit, usually $25 to $45, and suit hallways and open-plan areas well. Smart detectors, at $100 to $130 each, add phone alerts, voice warnings that name the room, and self-testing. A voice saying “smoke in the kitchen” is more useful at 2 a.m. than a generic beep. Combination smoke and carbon monoxide detectors, around $35 to $60, also make sense near bedrooms and fuel-burning appliances.
Room-by-Room Placement Guide
Start with this baseline: one detector inside every bedroom, one outside each sleeping area, and at least one on every level, including the basement and a finished attic. Then add coverage for living areas. Mount detectors on the ceiling at least 4 inches from any wall, or high on a wall with the top edge 4 to 12 inches below the ceiling. Smoke rises, so the ceiling centre is always best.
Bedrooms and Living Areas
Place the detector in the centre of the bedroom ceiling, away from ceiling fans, air vents, and windows where draughts can push smoke away. Do the same in the living room, especially if it has a fireplace, candles, or space heaters. In an open-plan space longer than about 30 feet, fit two detectors, one toward each end.
Kitchens and Hallways
Kitchens cause the most nuisance alarms, so position matters. Fit a photoelectric detector at least 10 feet from the hob and oven, ideally in the hallway just outside the kitchen rather than above the cooking area. That distance still catches real smoke quickly. In hallways, place a detector at each end of a long corridor and near the top of the stairs, where smoke collects first.
Basement, Utility Rooms, and Garage
In the basement, mount a detector on the ceiling near the bottom of the stairs, not above the furnace or water heater, where heat and dust can interfere. Add one in the laundry room, set back from the appliances. Never rely on a standard smoke detector in a garage, where exhaust fumes cause false alarms. Fit a heat alarm there instead, plus a smoke detector in the hallway connecting it to the house.
Use this quick checklist on your walk-through:
- One detector inside every bedroom, tested with the door closed to check it can be heard in bed
- One detector outside each group of bedrooms, within about 10 feet of the bedroom doors
- One detector on every floor, including the basement and any converted loft or attic
- Ceiling mounting wherever possible, at least 4 inches from walls and away from vents and fans
- Extra coverage in the living room and at the top and bottom of staircases
Common Placement Mistakes
The most common mistake is having too few detectors. A single hallway unit cannot protect a two-storey house, and it will sense a closed-door bedroom fire far too late. The second mistake is fitting detectors in dead-air spaces: the corner where wall meets ceiling, right beside a door frame, or in a spot smoke slides past entirely. Smoke can bypass those pockets completely.
Other frequent errors are easy to fix once you spot them:
- Mounting within 3 feet of a bathroom door, so shower steam triggers repeated false alarms
- Placing a detector directly above or beside the cooker, then removing its battery after the third nuisance alarm
- Painting over a detector during decorating, which blocks the sensing chamber
- Hanging a detector low on a wall or behind a door, curtain, or tall furniture
- Forgetting annexes, granny flats, and home offices where someone regularly sleeps on a sofa bed
If a detector keeps sounding for no clear reason, move it a few feet or switch to a photoelectric model rather than silencing it. A muted detector is the same as no detector.
Interconnecting Detectors for Whole-Home Warning
Interconnected detectors solve the audibility problem. When one unit senses smoke, every detector in the house sounds at once. That matters in a larger home, where a basement alarm may be inaudible from a second-floor bedroom with the door closed, and it matters even more for children, older relatives, and heavy sleepers.
New hardwired systems interconnect through the wiring itself. For existing homes, wireless interconnected detectors cost $30 to $55 each and link with a simple pairing process, with no new cables to run. When you upgrade, link the whole set rather than adding one smart unit to isolated older alarms. Test the link by pressing the test button on one detector and confirming the others sound within seconds.
Testing and Maintenance That Keeps Detectors Reliable
The routine takes minutes and should be tied to a date you will remember, such as the first weekend of each month.
- Press the test button monthly until the alarm sounds clearly; if the sound is weak or broken, replace the battery or the unit
- Replace removable batteries once a year, or choose sealed 10-year battery models that never need a battery change
- Vacuum the cover gently or wipe away dust and cobwebs every six months so smoke can enter freely
- Never paint a detector, and keep stickers or decorations off the casing
- Keep a simple note on the fridge or phone with install dates and test dates for each unit
The test button plus an annual check with canned smoke spray, about $8 to $12 a can, is enough for most households. If anyone in the home has hearing loss, fit strobe-light or vibrating-pad alarms in their bedroom, which cost $60 to $120.
When to Replace Detectors
Every smoke detector has an expiry date, because its sensor degrades whether it has ever alarmed or not. Replace the whole unit 10 years after the manufacture date printed on the back, not 10 years after you bought or fitted it. Write the replacement date on the cover with a marker when you install it.
Replace a detector sooner if it chirps repeatedly after a fresh battery, sounds randomly without smoke, fails the test button, or shows yellowing and damage. After any real fire, replace the nearest units, as heat and soot can compromise the sensor. Budget roughly $15 to $45 per replacement, and replace all same-age units at once.
Final Thoughts
Improving smoke detector coverage is one of the cheapest, fastest safety upgrades a homeowner can make. For most houses, full protection costs well under $200 and takes an afternoon with a step ladder and a screwdriver. Walk your home tonight: count the bedrooms, check each floor, and note any missing or expired units. Fill those gaps first, interconnect what you can, and you will have a genuine early warning system.
Frequently Asked Questions
How many smoke detectors does a typical house need?
A typical three-bedroom, two-storey house usually needs six to eight detectors: one in each bedroom, one outside the bedrooms, one in the living area, and one on each remaining level including the basement. Count bedrooms and floors first.
How do I stop kitchen alarms without removing the detector?
Move the detector so it is at least 10 feet from the hob, switch to a photoelectric model, and use the hush button during cooking instead of removing the battery. A hallway detector outside the kitchen still responds quickly.
Are hardwired or battery detectors better?
Both work well if they are maintained. Hardwired detectors with battery backup are ideal in new builds because they interconnect easily. Sealed 10-year battery wireless units are simpler to fit and just as reliable when tested monthly.
Should detectors go on the ceiling or the wall?
Choose the ceiling, in the centre of the room, whenever you can, because smoke rises and collects there first. Use a high wall position only when ceiling mounting is impossible, keeping the top of the detector 4 to 12 inches below the ceiling line.
Who is responsible for detectors in a rental property?
In most areas the landlord must fit working detectors before a tenancy starts, and the tenant must test them and report faults. Rules vary, so check your local requirements. Never remove a detector; report nuisance alarms and ask for it to be moved or upgraded.