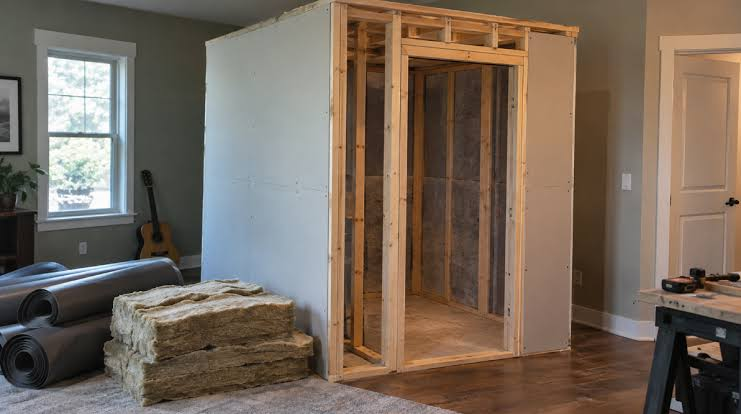
Soundproof Interior Wall Construction Methods That Help Reduce Noise Transfer Between Adjacent Living Areas
If you can hear every word from the next room, your interior wall is doing very little work. Most standard interior walls are just two sheets of half-inch drywall on a single row of studs, with an empty cavity in between. That construction is cheap and fast to build, but it was never designed to stop television dialogue, music, video calls, or a teenager’s gaming session at midnight.
The good news is that you do not need studio-grade construction to get a noticeably quieter home. The most effective walls combine four ideas: add mass, absorb sound inside the cavity, break the rigid connection between the two sides, and seal every air gap. This guide explains each method, with realistic costs and results, so you can choose the right level of work for a bedroom, office, nursery, or media room.
How Sound Travels Through Walls
Sound reaches the next room in two main ways. Airborne sound, such as voices, television, and music, pushes against the drywall and makes it vibrate like a speaker. That vibration then radiates sound on the other side. Structure-borne sound, such as footsteps, slamming doors, or a washing machine, travels directly through solid framing and is harder to stop.
Builders measure performance with the Sound Transmission Class, or STC, rating. A typical uninsulated wall is around STC 33, so loud speech can be understood clearly next door. At STC 45, loud speech becomes a murmur. At STC 55 to 60, most everyday noise is barely audible. Each step up takes more work than the last, so set a target before you buy materials.
Sound also takes detours, called flanking paths, over a wall through a shared ceiling, under a door, through back-to-back outlets, or along floor joists. A wall built to STC 55 will perform far below that if the door leaks or the ceiling path is left open.
- Voices and television are mainly airborne sound and respond well to mass and insulation.
- Bass and impact noise travel through framing and need decoupling to reduce them.
- The weakest element, often the door or a gap, sets the real-world limit.
Insulation and Mass Solutions
Filling the wall cavity is the easiest first upgrade, especially if you are already opening the wall. Mineral wool, often sold as stone wool, is the favourite for sound work because it is dense, fire-resistant, and easy to cut around wires and pipes. Fiberglass batts also help and cost less, while dense-pack cellulose works well in retrofit walls blown in through small holes.
Insulation mainly absorbs mid- and high-frequency sound inside the cavity. On its own it typically adds about 4 to 6 STC points. That is worthwhile, but it will not block bass by itself. Expect to pay roughly $0.80 to $1.50 per square foot for fiberglass and $1.20 to $2.20 for mineral wool, materials only.
Mass is the second half of the equation. Heavier, denser surfaces are harder for sound waves to move. Upgrading from half-inch to 5/8-inch Type X drywall adds useful mass at modest cost and improves fire resistance. In new construction, 2×6 studs instead of 2×4 studs let you fit thicker insulation and make staggered-stud construction possible, covered below.
- Choose mineral wool for a bedroom or office wall where fire resistance and density matter.
- Fill the cavity completely, but do not compress batts tightly, as compression reduces absorption.
- Insulate the full height of the wall, including the strip above any suspended ceiling.
Resilient Channels and Decoupling
Even a heavy, insulated wall will pass vibration if both sides of drywall are screwed rigidly to the same studs. Decoupling breaks that path. In new construction, a staggered-stud wall uses two rows of 2×4 studs on a wider 2×6 plate, alternating so each side of drywall touches only its own row. A double-stud wall goes further, with two separate frames and an air gap between them, and can reach very high ratings at the cost of floor space.
For remodels, resilient channel and isolation clips are more practical. Resilient channel is a thin metal strip screwed across the studs; new drywall is screwed only to the channel, which flexes and absorbs vibration. Clips with rubber isolators and hat channel perform better and are more forgiving, but cost more, typically $2 to $4 per square foot for clips, channel, and hardware.
Mistakes ruin decoupling quickly. One long screw that misses the channel and hits the stud creates a sound bridge. Use the correct screw length and follow the manufacturer’s clip spacing, usually every 16 to 24 inches.
Mass-Loaded Vinyl and Drywall Techniques
Mass-loaded vinyl, or MLV, is a heavy, flexible sheet, usually 1 to 2 pounds per square foot, stapled or screwed to the studs or over existing drywall before a new layer goes on. It adds mass without much thickness, which helps in tight rooms where losing inches matters. Cost is significant, commonly $1.50 to $3.00 per square foot, so use it where space is tight rather than everywhere.
For most homeowners, extra drywall is better value. A second layer of 5/8-inch drywall with a viscoelastic damping compound between layers is a proven combination. The compound converts some vibration into heat and is especially effective on low-frequency noise. Apply typically two tubes per 4×8 sheet, stagger all seams from the first layer, and seal the perimeter as described below.
- Use MLV when you cannot afford to lose room width but need extra mass.
- Overlap MLV seams by about an inch and seal them; do not leave butt gaps.
- With double drywall, stagger joints, offset outlets, and use longer screws into studs or channel only as designed.
- A second drywall layer plus damping compound often delivers more STC per dollar than MLV alone.
Sealing Gaps and Outlets
Sound leaks through air gaps the way water leaks through a roof. A gap as small as 1/16 inch along the base of a wall, around a pipe, or at the ceiling joint can undo thousands of dollars of added mass. Before drywall goes up, and again at the perimeter of the finished layer, run a continuous bead of acoustic sealant. Unlike hard caulk, it stays flexible for years and does not crack away.
Outlets and switches are direct holes between rooms when they sit back-to-back in the same stud bay. Move new outlets at least one stud bay apart, ideally 24 inches or more. For existing outlets, seal around the box, fit putty pads over the back, and use foam gaskets behind the cover plates. Apply the same treatment to recessed lights and plumbing penetrations.
- Seal the top and bottom plates, both sides of the wall, before drywall covers them.
- Back boxes with putty pads and never place outlets back-to-back.
- Seal pipe and cable penetrations individually, not just the visible drywall hole.
Doors and Weak Points
A soundproof wall with a hollow-core door is like a safe with a cardboard lid. Hollow doors weigh very little and often have large gaps underneath. Replacing one with a solid-core door is one of the highest-impact upgrades you can make, typically $200 to $500 for the slab plus hardware and fitting. Add a full perimeter seal and an automatic door bottom or a well-fitted threshold so the closed door actually contacts the seal all the way around.
Check other weak points too. Shared return-air ducts can carry voices between rooms, so ask an HVAC contractor about lined duct sections or offset transfer paths rather than blocking airflow yourself. Louvered doors and open transoms will also limit results. In many homes, fixing the door and its undercut, often a 3/4-inch gap, improves perceived quiet more than another layer of drywall would.
Budgeting and Performance Expectations
Plan in tiers. A basic upgrade during a remodel, with cavity insulation, sealed joints, putty pads, and 5/8-inch drywall, might cost $3 to $6 per square foot of wall and reach roughly STC 40 to 45. A mid-level build adding resilient clips or channel, a second drywall layer with damping compound, and a solid-core door often lands at $7 to $12 per square foot and reaches STC 50 to 55. A double-stud wall with double drywall both sides can exceed STC 60, but costs more, takes longer, and loses 2 to 4 inches of room space.
Be realistic about bass and impact noise. Even excellent walls reduce low-frequency music and footfall less than voices, because those sounds carry more energy through the structure. If the problem is a subwoofer or an upstairs treadmill, you may also need floor and ceiling treatment. Get quotes that state the full assembly, not just a headline STC number.
Final Thoughts
There is no single magic product for a quiet wall. The walls that work best layer the basics in the right order: fill the cavity, add mass, decouple where the budget allows, and seal everything, including the door. Start by identifying whether your main problem is voices, music, or impact noise, set an STC target that matches it, and spend first on the weakest link. Done carefully, even a mid-level upgrade can turn a room you can hear through into a room you can actually rest, work, and sleep in.
Frequently Asked Questions
What STC rating do I need for a bedroom wall?
Aim for at least STC 45 so loud speech becomes muffled, and STC 50 or higher if the next room is a living room or media room. That usually means insulation, sealed joints, and either 5/8-inch drywall or a second layer.
Can I soundproof a wall without removing the drywall?
Yes, to a point. You can add a second layer of drywall with damping compound over the existing surface, seal the perimeter, treat the outlets, and upgrade the door. You cannot add cavity insulation or decoupling clips without opening the wall, so gains will be smaller.
Is mass-loaded vinyl better than extra drywall?
Not usually on value. MLV is thinner and useful in tight spaces, but double drywall with damping compound typically gives similar or better results for less money per square foot. Choose MLV when thickness, not budget, is the main constraint.
Will soundproofing one wall stop noise from upstairs?
No. Noise from above travels through the ceiling and floor structure, not just the wall. You would need ceiling decoupling, insulation, and often floor underlayment upstairs. Treating only the shared wall will help with voices from the next room, not footsteps overhead.
Should I hire a professional or do it myself?
Sealing, putty pads, door seals, and a solid-core door are good DIY jobs. Hire a professional for double-stud framing, clip-and-channel systems, electrical moves, and any work involving fire-rated walls, so the assembly stays safe, legal, and free of sound bridges.