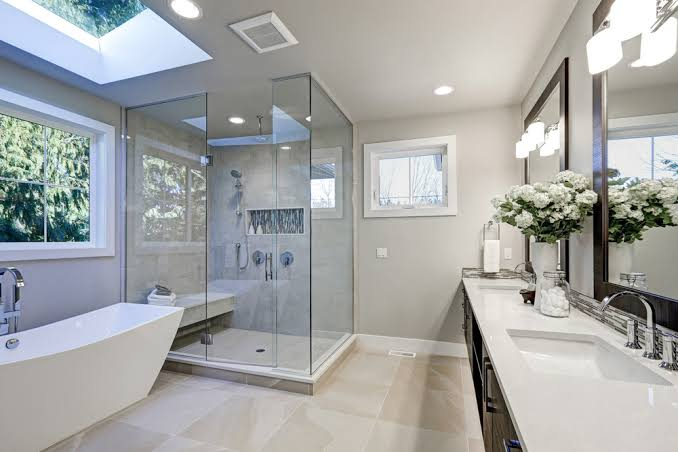
Modern Shower Improvement Ideas That Increase Comfort and Improve Bathroom Functionality
A good shower does more than get you clean. It wakes you up on a cold morning, loosens tight shoulders after a long day, and gives you a few quiet minutes that are entirely your own. When a shower is weak, cramped, mouldy, or cluttered with bottles, that daily ritual becomes something you rush through instead. You rarely need a full bathroom rebuild to fix it. Targeted improvements to water delivery, layout, surfaces, storage, light, and safety can transform how the shower feels, often in stages that fit a realistic budget.
This guide covers the upgrades that make the biggest practical difference, in sensible project order, with specific examples, realistic prices, and mistakes worth avoiding before any tile is removed.
Assessing Your Current Shower Before You Change Anything
Start by using your shower with fresh eyes for a week. Is the water hot enough but weak? Does the temperature swing when a tap runs elsewhere? Does water pool around your feet, leak onto the floor, or take minutes to drain? Does steam linger for an hour? Write the answers down, because each symptom points to a different fix, and guessing leads to expensive cosmetic work over a hidden fault.
Next, inspect the basics. Look for cracked grout, black spots, or spongy areas behind tile, which can mean water has reached the backing board. Check the tray or floor for movement, and time how long a bucket of water takes to drain.
- Fix first: Leaks, damaged waterproofing, poor drainage, and unsafe electrics.
- Improve next: Weak pressure, temperature swings, and a worn showerhead affect every shower you take.
- Improve last: Tile colour, fixtures, and glass, once the shower works underneath.
This audit protects your budget. A plumber who finds a failing valve on a planned visit costs far less than one called out after new tiles cover the problem.
Showerheads and Water Pressure That Actually Feel Better
For most households, this is the highest-impact, lowest-cost upgrade. A quality rainfall head, typically 200 to 250 millimetres wide, gives broad, even coverage, while a handheld head on a slide rail handles rinsing hair, washing children or pets, and cleaning the enclosure. Expect $40 to $150 for a good fixed head, $60 to $200 for a handheld set, and $250 to $600 for a combined rail system, fitted.
A bigger head will not fix low pressure. Ask a plumber to measure pressure and check for a clogged filter, a partly closed valve, or limescale, which a night soaking in vinegar sometimes cures. In homes with genuinely low pressure, a shower pump at $200 to $500 fitted can be transformative, provided your water heater can keep up. Avoid very large rainfall heads on low-pressure systems, as they spread the same water thinner and feel disappointing.
Valves and Temperature Control
A thermostatic mixer holds the temperature you set, even when someone flushes a toilet or runs the kitchen tap — a comfort and safety upgrade in one, especially for children and older relatives. Replacing a manual mixer usually costs $180 to $450 plus fitting, and is far easier before retiling than after. If you keep existing tiles, ask about retrofit valves, which cover the old footprint and save patching.
Walk-In and Curbless Showers for Space and Ease
Removing a bulky tray, step, and framed door opens a bathroom visually and physically. A walk-in shower uses a fixed glass panel, usually 8 to 10 millimetres thick, to contain spray while leaving entry open. A curbless design goes further: the floor runs level into the shower and water drains through a slot or linear drain in a gently sloped floor. Both make a small room feel larger, and both remove the trip edge that causes so many falls.
The work underneath matters more than the glass. A curbless floor needs enough depth to create the fall to the drain and fit proper tanking, the waterproof membrane protecting the structure. Upstairs, a low-profile shower former solves this; on a ground-floor slab it is usually simpler. Budget $2,500 to $6,000 for a walk-in conversion and $4,000 to $9,000 for a full curbless build.
- Panel width: At least 900 millimetres, ideally 1,100, keeps most spray inside.
- Floor slope: About 1 in 40 to 1 in 50 toward the drain.
- Splash zone: Aim the head away from the open entry.
Tiling and Grout Upgrades That Last
Tile choice decides how your shower looks in five years, not just on day one. Large-format porcelain, such as 600 by 600 millimetres, means fewer grout lines to clean and a calmer feel. On the floor, smaller tiles or mosaics follow the slope to the drain better and give more grip. Always check the slip rating: look for a finish rated for wet barefoot areas, or R10 to R11, rather than a glossy tile that turns treacherous when soapy.
Grout is the quiet hero. Cement grout absorbs water and stains. Epoxy grout costs more, typically adding $150 to $400, and needs a skilled installer, but it resists water, mould, and chemicals far better and rarely needs resealing. If a full retile is not in budget, regrouting and new silicone can refresh a sound shower for $200 to $500. Never tile over loose, cracked, or damp tiles, however tempting the saving.
Storage and Shelving That Ends Bottles on the Floor
Few things cheapen a shower faster than bottles balanced on the tray edge. A recessed niche, commonly 300 to 600 millimetres wide with two shelves, holds shampoo and soap inside the wall thickness, off the floor and out of direct spray. It must be built and tanked before tiling, so plan its height around the bottles your household actually uses, including tall pump bottles.
If opening a wall is not practical, good surface options exist that do not involve suction cups that fall at 2 a.m.
- Corner shelves: Stone or stainless steel, fixed through grout lines, at $30 to $90 each fitted.
- A tiled bench: About 450 millimetres high, doubling as seating, a footrest, and extra shelf space.
- A low shaving niche: Near ankle height, it gives a safe footrest and storage where you actually need it.
- Hooks and a squeegee: Encourage the 20-second wipe that keeps glass clear.
Lighting and Ventilation You Notice Every Day
Many showers sit in the darkest corner of the bathroom, lit by a single ceiling light behind you, so your body shadows the controls. Add a waterproof recessed downlight rated for use above a shower, in a warm-to-neutral 3000K to 4000K tone, and consider a low-level light on a separate switch for night use. Even, shadow-free light makes shaving, checking temperature, and spotting mould easier.
Ventilation is the other half. A fan that is too small, too loud, or switched off too soon lets steam settle into grout, paint, and timber. Choose a quiet extractor sized for your room, ideally with a humidity sensor or a 15 to 20 minute run-on timer, at $150 to $450 fitted. Vent it outside, never into a loft. A window helps, but in winter nobody opens it for long enough.
Accessibility and Safety Features for Every Age
Features once labelled only for older people make showers better for everyone: a parent holding a toddler, an athlete with a sprained ankle, or anyone recovering from surgery. Designing them in now costs little and avoids a rushed retrofit later.
- Grab bars: By the entry and controls, at $40 to $120 each fitted, anchored into studs or solid backing, never just tile.
- Handheld shower on a slide rail: Lets each user set the height, and lets a seated user shower independently.
- Thermostatic control with an easy-grip lever: Prevents scalds, works with soapy hands, and should be reachable before you step under the water.
- Slip-resistant floor and a fold-down seat: A teak or moulded seat, at $120 to $350, makes longer, safer showers possible.
Keep the entry as level as you can, light any step that remains, and avoid loose mats inside the shower, which can slip on a wet tray.
Budget and Phasing: Getting the Most From What You Spend
You do not have to do everything at once, but you do have to do it in the right order. Phase one is the invisible work: plumbing, valve, drainage, waterproofing, ventilation, and electrics. Phase two is structure: curbless floor, niches, bench, and glass. Phase three is finish: tiles, fixtures, lighting, and accessories. That order means no finished surface is ever ripped out to reach a pipe.
As a guide, a refresh with a new head, regrouting, resealing, a shelf, and a better fan can land between $600 and $1,500. A mid-range upgrade with retiled walls, a walk-in panel, and new controls often runs $3,500 to $8,000. A full curbless rebuild sits at $8,000 to $15,000 or more. Hold back 10 to 15 percent as contingency, get itemised quotes, and check that waterproofing and electrical work carry the certifications your area requires.
Final Thoughts
The best improvements are the ones you feel every morning without thinking: water at the right temperature and pressure, a floor that drains cleanly and grips your feet, shelves where your hand expects them, light you can see by, and air that clears quickly. Fix hidden faults first, and phase visible upgrades in an order that never wastes finished work. Even a modest shower then becomes one of the most comfortable spaces in your home.
Frequently Asked Questions
How much does a typical shower improvement cost?
A refresh with a new head, regrouting, and resealing costs $600 to $1,500. Retiling with a walk-in panel is commonly $3,500 to $8,000, while a curbless rebuild can reach $8,000 to $15,000.
Can I make my existing shower curbless without rebuilding the whole bathroom?
Often, yes, if there is enough floor depth for the slope and waterproofing. Upstairs timber floors usually need a low-profile former. An installer visit will confirm feasibility.
Why is my shower pressure still weak after fitting a new head?
The head is rarely the whole cause. Check for limescale, a clogged filter, a partly closed valve, or low incoming pressure. A pump or a low-pressure head will help more than a larger rainfall head.
How long does a shower upgrade usually take?
Swapping a head, shelf, and fan takes a day or less. Retiling with walk-in glass takes four to seven working days, including curing time. A curbless rebuild takes one to two weeks, so plan an alternative place to wash.
Which shower jobs can I safely do myself?
Confident homeowners can replace a showerhead, fit shelves, regrout small areas, and replace silicone. Leave waterproofing, drainage, electrics, and glass to professionals, because failures there stay hidden until they cause expensive damage.