Under Sink Plumbing Organization for Residential Kitchens With Multiple Filtration and Disposal Systems
Open the cabinet under a busy kitchen sink and you often find the same scene: a garbage disposal bolted to one basin, a reverse osmosis tank wedged against it, a filter manifold hanging behind the trap, a tangle of thin feed lines,. Nothing is broken, yet nothing is reachable. The filter change gets postponed, the shut-off valve hides behind a sponge caddy, and the first sign of a slow leak is a swollen cabinet floor. That chaos is not a storage problem. It is a layout problem, and it is fixable.
The Short Answer: Give Every System Its Own Zone Under the Sink
Divide the cabinet into zones before buying a single bin. Keep the disposal and drain assembly in the center, give the reverse osmosis tank and filter manifold a side zone with room to lift cartridges straight out, reserve a shallow front zone for daily items like dish soap and sponges, and leave the floor under the trap clear so a drip shows itself at once. Label every shut-off valve and feed line, protect the floor with a waterproof tray, and never stack storage on a filter housing or against a disposal. A cabinet arranged this way stays serviceable: you can change a filter, reset a disposal, or close a valve without removing anything else first.
Mapping What's Actually Living Under Your Kitchen Sink
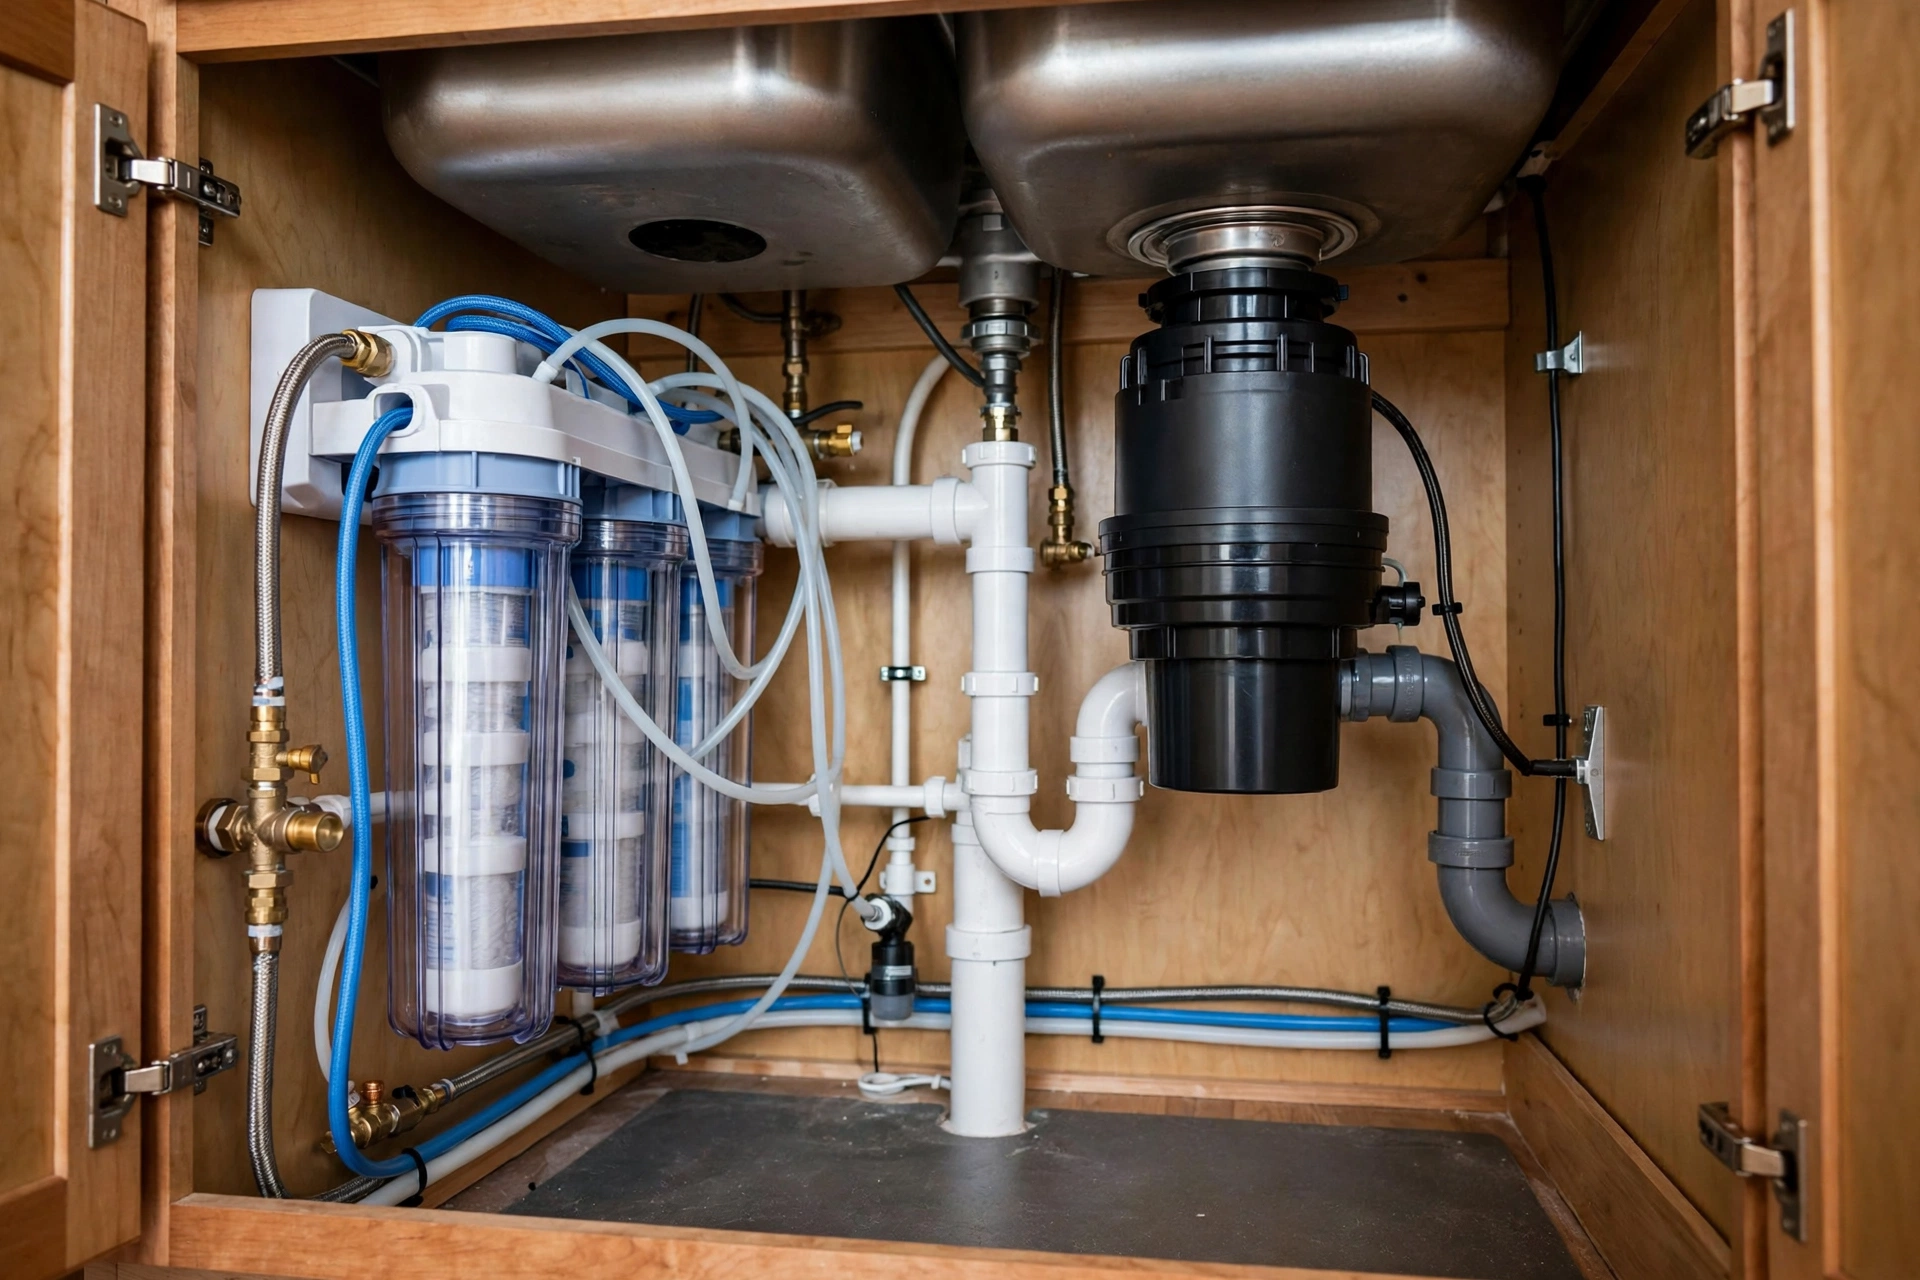
Empty the cabinet completely and note what is there: a garbage disposal on one basin, a P-trap and drain assembly, hot and cold supply lines with angle-stop valves, a reverse osmosis (RO) unit with pre-filters, a membrane housing, and a pressurized storage tank, plus possibly a dishwasher hose, a second filter, or an instant-hot tank. Mark which items you touch regularly and which a technician touches once or twice a year, because the frequent items earn the most accessible spots.
Then find the service points: filter housings need clearance to unscrew, RO tanks need room to be lifted, and disposals need access to the reset button underneath. Check each unit's manual for its required clearance, looking it up by model number if it is missing.
The Plumbing Core Comes First: Trap, Disposal, and Drain Lines You Must Not Box In
The drain assembly cannot be moved for convenience, so it sets the layout. Leave a breathing zone around the disposal and trap: nothing should press against the disposal body, rest on the trap, or pinch a drain hose. A disposal vibrates when it runs, and a bin wedged against it will rattle, creep, and eventually stress a slip-joint connection loose. The dishwasher drain hose, which typically loops up high to prevent backflow into the dishwasher, must never be kinked, flattened, or weighed down.
Fitting a Reverse Osmosis Tank and Filters Beside a Disposal Without Crowding
The RO unit is usually the hardest piece to place, because it is really three things: a manifold holding several filter housings, a membrane housing, and a storage tank that is heavy when full. Mount the manifold on a side or back wall where its housings can be turned without removing the tank, and give the tank a flat floor spot where it can be lifted straight out — not wedged behind the disposal. In many cabinets the winning split is disposal in the center under its basin and tank in the side bay under the other basin.
Keeping the RO Drain Saddle Clear of the Disposal
The RO system sends reject water to the drain through a small saddle clamp or drain line adapter, and that connection should sit upstream of — and as far as practical from — the garbage disposal. Food waste ground by the disposal can clog a drain saddle placed too close to it, and backflow can push debris into the RO drain line. Some plumbers prefer a drain adapter that replaces the disposal elbow and gives the RO drain its own port, which also removes the gurgling some RO drains make. Keep that fitting visible and reachable, never buried behind the tank.
Where the Second Filter, Softener Loop, or Instant-Hot Tank Earns Its Corner
Many kitchens add a second system on top of RO: a softener loop, a separate carbon filter for the fridge line, or a small instant-hot tank. The rule is the same — service access first — but priority order matters: the component serviced most often should be most accessible. Put a carbon filter changed twice a year in front of an instant-hot tank touched once every few years, never the other way around. Instant-hot tanks need clearance from stored towels and plastic bins, since they run hot, and their relief line must stay unobstructed.
Zoning the Cabinet: A Layout That Keeps Filters Reachable and Valves Visible
With the fixed equipment placed, divide the remaining space into three zones. The back zone belongs to plumbing and filters, reachable without moving storage. The middle zone is a working gap — a few inches of open air in front of the trap and valves so a hand and a wrench fit. The front zone, nearest the doors, is the only place for everyday items. When the front zone fills up, declutter — do not start stacking things into the back zone.
Storage That Works Around Pipes: U-Shaped Pull-Outs, Door Racks, and Riser Shelves
Standard rectangular bins are the enemy of an under-sink cabinet, because pipes are not rectangular. The organizers that actually work are shaped around the plumbing: a U-shaped pull-out wraps around the trap and disposal, using the dead space on either side while leaving the center open; a door-mounted rack holds light items on the otherwise wasted door interior; a riser shelf raises bottles above low pipes in a side bay. Choose materials that tolerate damp — powder-coated metal and sturdy plastic — and fasten organizers so they cannot slide into pipes when a door slams.
What Belongs on the Cabinet Door, and What Does Not
The door suits light items: a small caddy for sponges or a slim rack for spray bottles. Hang nothing heavy over the hinge side, where it can pinch a feed line, and check the rack clears the disposal and RO tubing through the door's full swing.
Labeling Shut-Offs, Lines, and Filter Dates So Anyone Can Find Them in a Hurry
In a leak, nobody has time to puzzle out which of three valves feeds the RO unit. Label every angle stop — hot, cold, RO feed, and fridge line if one branches off under the sink — and label the RO feed and drain lines where several thin tubes run together, so a technician or future homeowner need not trace a line by hand. Put a filter log on the inside of the door: the date each cartridge was last changed, the cartridge type, and the next due date. Most pre-filters are changed roughly every six to twelve months and RO membranes every two to three years, but follow your manufacturer's schedule.
- Hot and cold angle stops: label and test them twice a year so they do not seize.
- RO feed valve: label it clearly, with filter change dates beside it.
- Disposal reset button and switch: mark their positions for dim light.
- Main house shut-off: write its location on the door card.
Leak-Proofing the Cabinet Floor Before You Slide Anything Back In
Before anything goes back, line the cabinet floor with a waterproof tray or flexible containment mat with a raised lip, cut around pipes if needed. A tray catches a slow drip before it soaks into the cabinet base, and it makes a leak visible — water pooling on a smooth tray is obvious in a way that water soaking into wood is not. Keep the tray itself clear of storage so it can do that job. Add a battery-powered water leak alarm at the lowest point of the floor, near the trap or RO connections, not on top of a shelf.
Under-Sink Organization Slip-Ups That Starve Filters and Strain Disposals
Most under-sink problems come from a handful of repeatable mistakes. Storing heavy bottles on a filter housing cracks housings and turns cartridge changes into a wrestling match. Resting a bin against the disposal transfers vibration into slip joints and slowly loosens them. Running RO tubing in a tight bend around a shelf edge kinks the line and reduces flow, which many homeowners misread as a failing membrane and replace unnecessarily. Chemical storage is another common slip: bleach and drain openers release fumes that corrode metal trap parts and supply lines, so keep corrosive products sealed, upright, and away from metal plumbing.
What an Organized Under-Sink Setup Costs, From Caddies to Custom Pull-Outs
Costs vary by cabinet size and existing hardware, so treat these figures as rough estimates for planning, not quotes. The basics — a waterproof tray, a leak alarm, labels, and door racks — are inexpensive and deliver most of the benefit. A plumber's visit to re-route lines or add a proper drain adapter sits at the top of the range, and it is worth it when the current layout physically cannot be serviced.
When the Tangle Under Your Sink Calls for a Licensed Plumber
Some under-sink situations are beyond organizing. Call a licensed plumber if you find active leaking at a soldered joint, a corroded or green-stained supply line, a disposal that trips its breaker or hums without turning, a drain that backs up into the other basin, or any sign of water damage, swelling, or mold in the cabinet base. Also call one before moving a drain, adding a new drain connection for a filter system, or working on anything connected to a gas line or water heater. Local codes vary for RO drain connections and air gaps, and a plumber can confirm what your area requires.
Final Walk-Through: A Calm Cabinet You Can Actually Service
When the work is done, the test is simple: can you change a filter, reset the disposal, and close every valve without moving anything else? If yes, the cabinet is organized. Revisit the layout whenever a system is added or replaced, because each new component deserves its own zone. Such a cabinet will never be empty or elegant. It needs to be legible: every line labeled, every filter reachable, every valve visible, and the floor clear enough to warn you early.
Under-Sink Plumbing Organization Questions Homeowners Ask Most
Can a reverse osmosis drain share a drain line with a garbage disposal?
Yes, with the right fitting. Install the drain saddle or adapter upstream of and away from the disposal, so ground waste cannot clog it and backflow cannot reach the RO drain line.
How often should under-sink filter cartridges actually be changed?
Follow your manufacturer's schedule. As a general guide, pre-filters are typically changed every six to twelve months and RO membranes roughly every two to three years, though water quality and usage shift those intervals.
Can I keep a trash bin under the sink with a filtration system?
You can, but only if the bin does not block filter access, press against the disposal, or hide floor leaks. A slim pull-out bin in the front zone usually works; a bin wedged behind the tank does not.
Do I need an air gap for my reverse osmosis system?
It depends on local code and system design. Many RO systems use an air gap faucet, which prevents drain water siphoning back into the purified line, while others use a code-listed drain adapter. If unsure, ask a licensed plumber, since backflow protection is a health matter.
Why does my disposal vibrate a storage bin loose?
A disposal vibrates when it runs, and anything resting against it slowly shifts. The fix is clearance: keep bins and bottles from touching the disposal body, and fasten organizers so they cannot slide into it.
Is it safe to store cleaning products under the sink with all this plumbing?
Most everyday products are fine if sealed, upright, and kept away from metal trap parts and supply lines. Keep bleach and drain openers in sealed containers and, where possible, in a separate location.
What should I do first if I find water under the sink?
First, close the nearest shut-off valve — that is why labeling matters — and towel up the water. Then identify the source: supply connections, the trap, the disposal elbow, and RO fittings are the usual suspects. A weeping slip-joint nut can often be tightened by hand; other leaks mean calling a licensed plumber.