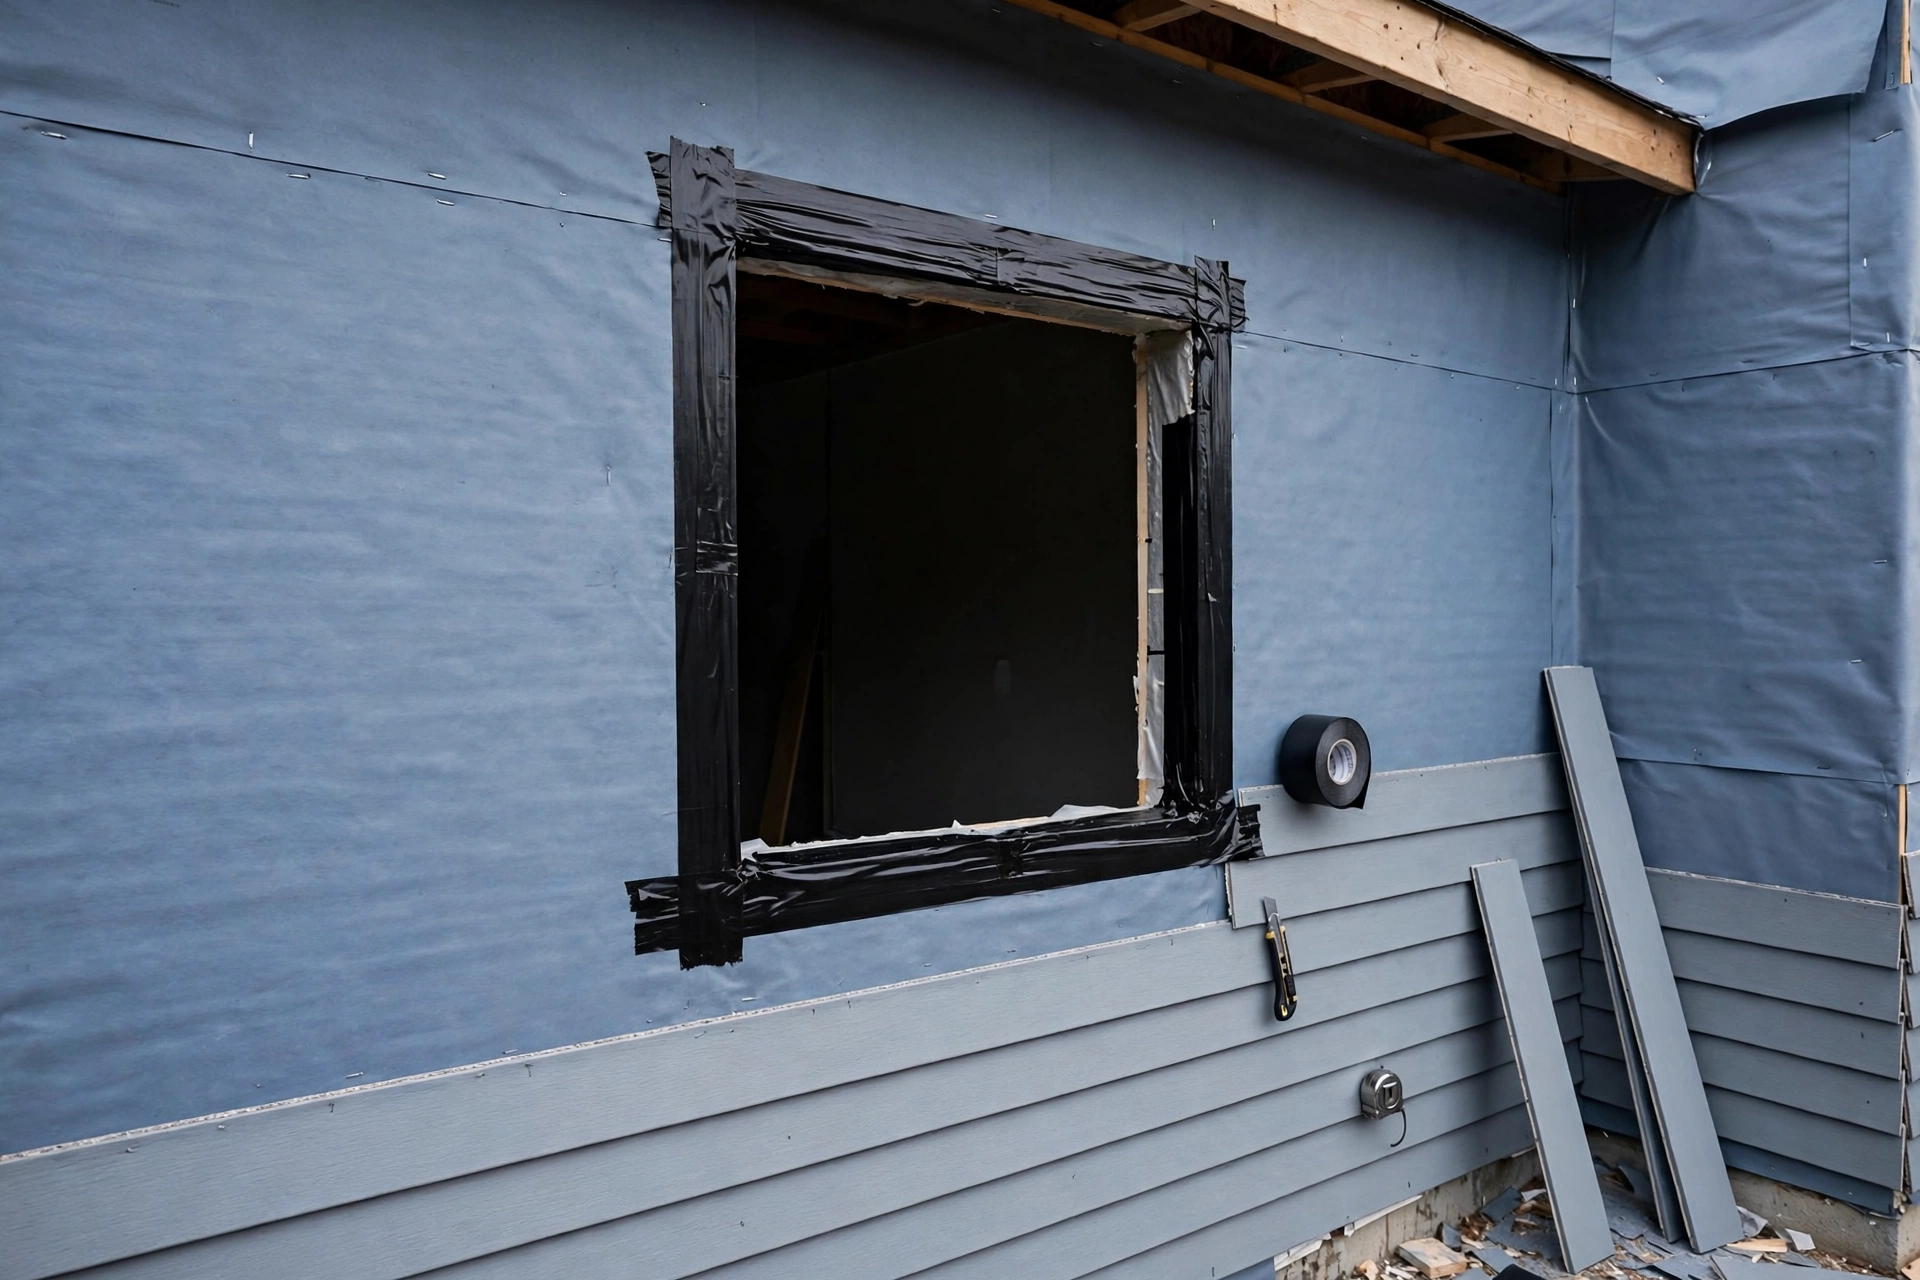
When Should Residential Exterior Siding Receive Additional Flashing Around Window Openings
A window opening is the most leak-prone spot on any sided wall. Siding is only the outer skin: wind-driven rain gets behind it, runs down the weather-resistive barrier, and looks for any gap around a window frame. Flashing is the hidden system of metal and membrane pieces that catches that water and sends it back outside before it reaches the framing. Most homes already have some flashing around their windows, but the original detail is often missing, damaged, or not enough for the wall it sits in. Knowing when to add more flashing is the difference between a dry wall cavity and a slow rot problem that stays invisible for years.
The Short Answer: When Window Openings Need Extra Siding Flashing
Add flashing around a window opening whenever water can reach the rough opening faster than the existing detail can drain it away. In practice, that means: when new siding goes over old walls, when windows are replaced without disturbing the siding, when the original flashing is missing or damaged, when the wall has no drainage gap behind the cladding, and when a window sits in an exposed, wind-driven-rain location. It is also warranted whenever a leak has already appeared, whenever trim or siding is replaced around a window, and whenever the siding material changes, since each cladding meets the frame differently. If the wall is opened for any reason and the flashing is found incomplete, that is the moment to add it.
Flashing and caulk do different jobs: caulk seals a joint against surface water, while flashing manages water that has already got past the siding. Fresh caulk over a window with no head flashing or sill pan traps water inside the wall.
How Siding, House Wrap, and Window Flashing Are Supposed to Work Together
A sided wall protects a home in layers. The siding deflects most rain. Behind it, the weather-resistive barrier, usually house wrap or building felt, catches water that slips past the siding and drains it downward. Window flashing ties the window unit into that barrier so water cannot slip sideways into the rough opening. The order matters more than any single product: flashing is installed bottom to top, so every upper piece laps over the piece below it. Sill flashing goes first, jamb flashing overlaps its ends, and head flashing goes last with its top edge tucked behind the house wrap above the window. Reverse that order and the detail collects water instead of shedding it.
Seven Situations That Call for Additional Flashing Around a Window Opening
New siding over an existing wall. Once old siding comes off, the original flashing is visible for the first time in years. If it is torn or absent, this is the cheapest moment to add it.
Window replacement with the siding left in place. Insert windows are set into the old frame without touching the exterior flashing, so a new window inherits any drainage gap the old one had.
A change of siding material. Vinyl, fiber cement, wood, and stucco meet a window frame differently. Switching materials without updating the flashing leaves an old detail serving a new cladding.
Windows in exposed locations. Upper-storey and gable-end windows, and windows facing the prevailing storm direction, take far more water than sheltered openings.
Walls without a drainage gap. Older walls with siding nailed tight to the sheathing give trapped water nowhere to go. A sill pan and drip cap give it an exit route.
Trim or siding repair around a window. Once trim is off, renewing the flashing costs little extra and fixes what probably caused the rot in the first place.
Any sign of a past leak. Stains below a window or paint peeling at the sill corners mean water is already reaching the frame, and flashing is the repair itself.
Reading the Warning Signs: Stains, Soft Trim, and Peeling Paint Near a Window
Flashing problems rarely show up as water pouring in. Inside, look for staining or bubbling paint on the drywall below a window, and trim that has swollen or pulled away from the wall. Outside, look for staining on the siding beneath a window, cracked caulk at the frame perimeter, and wood trim that feels soft when pressed with a screwdriver. A sill that holds a puddle after rain, or weep holes blocked with paint, is another warning: the window's own drainage path is shut and water is finding another way out, usually into the wall.
A hose test separates a flashing failure from a caulk failure. With one person inside watching, spray from the sill upward to the head and corners, holding each position for several minutes. Water appearing only at the head points to head flashing; water at the sill points to the sill pan. Never seal over a leak before this check.
Which Siding Types Change the Flashing Detail at a Window
Every cladding sheds water differently. Vinyl is a drained system by design: water routinely runs behind it, so the window's J-channel must tie into the flashing and drain out at the sill. Fiber cement usually has a rainscreen gap, which helps, but its trim joints still need head flashing. Wood siding absorbs and releases moisture seasonally, so its flashing must resist corrosion and never trap water against the boards. Stucco and brick veneer store water and release it slowly, so windows in masonry walls rely heavily on through-wall flashing and weep paths at the sill. When the siding type changes, or two claddings meet at a window, review and usually upgrade the flashing detail.
Sill Pans, Head Flashing, and Jamb Tape: The Three Pieces That Must Overlap in Order
Additional flashing is three pieces working as one system, and the order is not optional. The sill pan comes first: it lines the bottom of the rough opening, slopes outward at roughly 5 to 10 degrees, and extends past the opening with its ends turned up. A back dam, a raised strip at the inside edge, stops water running inward. Jamb flashing goes second, as vertical strips overlapping the sill pan's ends and extending past the head. Head flashing goes last, overlapping the jamb flashing with its upper edge tucked behind the house wrap. Butyl tape seals irregular shapes, while metal provides the durable drip edge.
Adding Flashing to an Existing Window Without Removing the Whole Unit
Adding flashing usually does not mean replacing the window. Retrofit flashing improves drainage while the unit stays in place, and it suits cases where the frame is sound and only the exterior detail has failed. The trim and nearby siding courses come off, exposing roughly six inches of sheathing past the opening, the house wrap is folded back, and the new sequence applied: sill pan first, then jamb strips, then head flashing tucked behind the wrap above. The wrap is folded back over the lower pieces in shingle fashion, the trim reinstalled with a drip cap, and the siding refitted with a small drainage gap. If probing finds rotted framing, or the window is badly out of square, the unit must come out and the opening rebuilt.
Caulk Is Not Flashing: Where Sealant Helps and Where It Hides a Problem
Caulk seals the visible joint between frame and trim, and it is the right fix for a cracked bead at an otherwise well-flashed joint. It is the wrong fix for a missing sill pan or head flashing, because that water travels behind the siding, not through the visible joint. Caulk also needs renewal every several years, and a joint that keeps cracking after repeated re-caulking usually signals water behind the trim. Caulking a sill's bottom edge or sealing weep holes shut traps water inside the frame and wall. The rule is simple: caulk seals joints you can see, flashing manages water you cannot see.
What Additional Window Flashing Work Costs, and What Drives the Price
Treat the figures below as planning estimates, not quotes; they vary by region, window size, and how much siding must be removed. Materials are inexpensive and the cost is mostly labour. Access pushes prices up, as does hidden damage found once trim comes off. Re-siding time is cheapest, since the labour is already paid for.
Siding Flashing Slip-Ups That Send Water Straight Into the Wall
Most flashing failures come from a handful of installation errors, not bad products:
- Reverse laps: head flashing under jamb flashing, or jamb flashing under sill flashing, so a seam catches water and funnels it inward.
- No sill pan: the window sits on a flat, unflashed sill, so water past the frame soaks straight into the sill plate.
- Head flashing sealed to the siding instead of tucked behind the house wrap, letting water running down the barrier slip behind it.
- Tape applied over dusty, damp, or cold sheathing, so the membrane never bonds and peels away within a season.
- Weep holes and sill drainage paths caulked or painted shut, trapping water inside the frame and wall.
- Flashing butted tight against cladding with no drainage gap, so water wicks back into trim boards.
Ask to see the opening after the sill pan is installed and photograph each stage.
When a Window Flashing Problem Is Bigger Than a Weekend Repair
Call a qualified siding or window contractor when probing finds soft or crumbling wood in the sill, jambs, or framing: that indicates water trapped in the wall cavity for an extended period. The same applies when a window is racked out of square and will not operate, when leaks persist after two re-sealing attempts, or when the wall shows mould or swollen drywall. Second-storey work, windows above sloped roofs, and older homes that may contain lead paint all call for proper equipment and certified handling.
Final Thoughts: Deciding Whether Your Windows Need Extra Flashing Now
Additional flashing is warranted whenever the drainage path is incomplete, damaged, or mismatched to the siding, and the best time to add it is whenever the wall is already open for siding, trim, or window work. A window that has never leaked and sits under a deep overhang may need nothing more than fresh caulk and clear weep holes. A window with stains below it, soft trim, or a history of re-caulking needs attention now, while the repair is still a flashing job rather than a framing job. Walk around the house once a year checking each sill, corner, and the siding course below it.
Siding and Window Flashing Questions Homeowners Ask Before Starting
Do new windows need extra flashing if the old siding stays in place?
Often, yes. A replacement window inherits whatever flashing the old one had, and older installations frequently lack a sill pan or head flashing tied into the house wrap. Retrofit flashing can be added by removing just the trim and nearest siding courses.
Can flashing be added behind existing siding without removing it all?
Yes. Usually only the trim and the siding courses immediately around the window come off, exposing about six inches of sheathing past the opening. Full removal is only needed when damage extends well beyond the window.
Should the head flashing go over or under the house wrap?
Its top edge must tuck behind the house wrap above the window, so water running down the barrier flows onto the flashing and out over the trim. If it sits on top of the wrap, water can slip behind it into the opening.
Does vinyl siding J-channel replace window flashing?
No. J-channel receives cut panel ends and channels some water, but it is not a waterproof flashing system and is not sealed to the rough opening. A vinyl-wall window still needs a sill pan, jamb flashing, and head flashing.
How do I know whether a leak comes from flashing or failed caulk?
Use the hose test, spraying bottom-up and pausing at the sill, jambs, and head. A leak only at upper areas points to head or jamb flashing; a leak at the sill points to the sill pan. If fresh caulk stops a leak only briefly, flashing is the likelier cause.
Is additional flashing needed on windows under a deep porch roof?
Usually less is needed, since an overhang shields the window from most wind-driven rain, but it is not a reason to skip flashing entirely. Wind can still drive rain sideways under a porch roof, and a basic sill pan and head flashing remain cheap protection.