Advanced Residential Well Water Treatment Systems for Removing Iron Bacteria and Sediment Contamination From Household Water Supplies
Well water can look clear and still be a problem. Iron stains the sinks orange, sediment grits up the aerators, and iron bacteria leave a slimy orange film in toilet tanks along with a swampy smell that no amount of flushing removes. A single filter cannot fix all three, because each contaminant needs a different stage — and the stages only work when they are installed in the right order. This guide explains how to test first, match each result to its treatment, and build a system that keeps household water clean without fouling expensive equipment.
The direct answer is that a working well system follows a sequence: sediment filtration first, then iron and bacteria treatment, then softening if the water is hard, and disinfection last. Skip the test, put a stage in the wrong place, or treat iron with a softener alone, and the system will clog, foul, or fail. The sections below follow that sequence, so you can see why each stage sits where it does.
Iron Stains and Slimy Bacteria Mean Your Well Needs a System, Not a Filter
Private wells receive no municipal treatment, so the homeowner is the water utility. The most common problems are sediment, iron, manganese, sulfur, hardness, and bacteria, and about four in ten well tests show two or more problems at once. Iron above roughly 0.3 parts per million stains fixtures and gives water a metallic taste; above 2 to 3 parts per million, a water softener alone cannot cope. Iron bacteria are different from dissolved iron: they are living organisms that feed on iron and build slimy colonies in the well, pipes, and toilet tanks.
Sediment is the grit — sand, silt, and clay — that clouds water and wears out valves, pump seals, and every filter downstream. It also shields bacteria from ultraviolet light, which is why disinfection always comes after the water is clear. Treating well water is therefore a chain: each stage protects the one after it, and a weak first link shortens the life of everything behind it.
Which Contaminants Your Lab Test Is Actually Flagging
Start with a comprehensive lab panel from a state-certified lab, not a free test from a company selling equipment. A thorough panel covers total coliform and E. coli, nitrates, pH, total dissolved solids, hardness, iron, manganese, hydrogen sulfide, arsenic, and lead, and typically costs roughly $150 to $400. The EPA recommends testing private wells annually for bacteria and nitrates, with a broader panel every three years and after floods, nearby construction, or any change in taste, odour, or colour.
Read the results against the secondary drinking water standards: iron at 0.3 milligrams per litre, manganese at 0.05. Any detection of E. coli is an immediate health issue — stop drinking the water and act. A test also tells you what not to buy: a softener for a sulfur smell, or a carbon filter for iron, are the classic expensive mistakes, and both come from treating a symptom instead of a test result.
Iron Bacteria: The Slimy Colony Behind the Rotten-Egg Smell
Iron bacteria show up as rust-coloured slime in toilet tanks, a swampy or oily smell, and water that stains even after filtration. They thrive where dissolved iron and oxygen meet — in the well casing, the pressure tank, and the first feet of plumbing. They do not usually cause illness directly, but their colonies clog pipes, foul filters, and shelter other bacteria, including coliform, from treatment.
The first step is often shock chlorination: a strong chlorine dose circulated through the well and plumbing, left to sit, then flushed out, followed by a retest. If coliform persists after shock chlorination, have a licensed well contractor inspect the casing, cap, and seals before buying treatment equipment, because bacteria often enter through a cracked casing or surface water pooling around the wellhead. Fixing the well itself matters more than adding another filter to a leaking system.
Sediment First: Why Grit Gets Filtered Before Anything Else
Sediment filtration is almost always the first stage after the pressure tank. A spin-down filter or a cartridge filter catches sand and silt before they can score valve seats, clog an iron filter’s media bed, or cloud the water so badly that a UV lamp cannot reach the bacteria. Use a gradient approach: a coarser 20 to 50 micron stage for heavy grit, then a 5 micron cartridge before UV or carbon stages. A 5 micron pre-filter is a requirement ahead of any UV chamber, because turbidity shields microorganisms from the light.
| Stage | What it removes | Position | Why it sits there |
| Sediment filter | Sand, silt, grit | First, after pressure tank | Protects every stage downstream |
| Iron filter | Iron, manganese, sulfur | After sediment | Iron fouls softener resin permanently |
| Water softener | Hardness minerals | After iron filter | Resin stays clean and effective |
| Carbon filter | Taste, odour, chemicals | After softener | Polishes water for the tap |
| UV disinfection | Bacteria, viruses | Last | Needs clear water to work |
The order is not a suggestion. Iron binds to softener resin permanently, fouling capacity that regeneration cannot restore, so the iron filter always goes before the softener. Carbon sits after the softener because chlorine and chemicals are best removed once the water is already soft. UV goes last, once the water is clear and soft enough for the light to do its work.
Oxidizing Iron Filters That Turn Dissolved Iron Into Particles
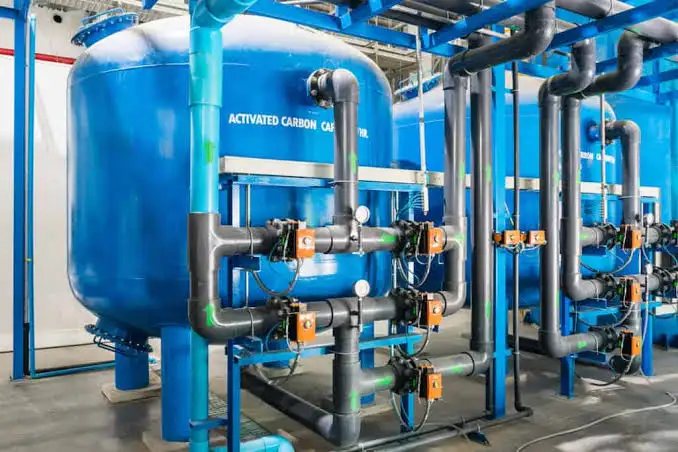
Dissolved iron is invisible in the glass and only turns orange after it meets air. An oxidizing iron filter fixes that by turning dissolved iron into solid particles first, then trapping them. Air-injection filters draw in air, oxidise the iron, and backwash the trapped particles away on a schedule. Greensand filters use a manganese-coated media that oxidises iron and manganese on contact. Chlorination followed by filtration works the same way for heavier loads, with a carbon stage afterwards to remove residual chlorine.
Oxidizing iron filters typically handle iron up to roughly 30 parts per million, far beyond what a softener can manage. They need a drain for backwash water and a power supply for the control valve, and they need the sediment stage ahead of them so grit does not clog the media bed. Choose the media and the backwash schedule from the iron and manganese numbers on your test, not from a product brochure’s maximum rating.
Chlorination, Greensand, and Air Injection Compared
Each iron treatment has a different appetite for maintenance. Air injection is the simplest to live with: no chemicals to buy, just a backwashing filter and a compressor or venturi that adds air. Greensand needs periodic regeneration with potassium permanganate, which is an extra chemical to store and handle. Continuous chlorination handles the heaviest iron and bacteria loads, but it needs a chemical feed pump, a contact tank, and a carbon filter to strip the chlorine before the tap.
| Method | Iron capacity | Chemicals needed | Maintenance |
| Air injection filter | Up to about 30 ppm | None | Backwash schedule, media checks |
| Greensand filter | Moderate to high | Potassium permanganate | Regeneration and media replacement |
| Chlorination + filtration | Very high | Chlorine | Pump, contact tank, carbon stage |
| Water softener alone | Up to about 2-3 ppm | Salt | Resin fouls above that range |
For most households with moderate iron, an air-injection filter is the practical pick. Step up to chlorination when iron is very high, when sulfur smell is strong, or when bacteria keep returning after shock chlorination. Whatever you choose, size it from the test numbers and keep the sediment filter ahead of it.
UV Disinfection and the Clear-Water Rule It Depends On
Ultraviolet disinfection passes water past a high-intensity lamp at 254 nanometres, damaging the DNA of bacteria, viruses, and protozoa so they cannot reproduce. It adds no chemicals and needs little maintenance beyond an annual lamp change and a quartz sleeve cleaning. It is the preferred residential disinfection method — but only when the water reaching it is clear. Turbidity, iron, and hardness all shield microbes from the light or coat the sleeve, which is why UV always sits at the end of the train.
Installing the Treatment Train in the Right Order
Install the stages on the main line after the pressure tank, in the sequence the test calls for, with a bypass valve and isolation valves around each stage so any one unit can be serviced without shutting down the house. Leave clearance for cartridge changes, media replacement, and lamp swaps, and route every backwash drain to a proper drain with an air gap.
Mount the sediment filter first, directly after the pressure tank.
Install the iron filter next, with its drain line and power supply connected.
Add the water softener after the iron filter, never before it.
Place the carbon filter after the softener for taste and odour polishing.
Install the UV chamber last, with the 5 micron pre-filter immediately ahead of it.
Add a pressure gauge before and after the train to spot a clogged stage early.
Flush the whole system, then test the water at a tap and compare it with the lab panel.
If the well has low pH, an acid neutralizer goes near the front of the train — its position is set from the test. A reverse osmosis unit at the kitchen tap is a separate, optional step for drinking water, not part of the whole-house line. Do not install a stage you have no test result for; every extra stage is another thing to maintain.
Well Water Treatment Mistakes That Foul Expensive Equipment
The most expensive mistake is putting the softener before the iron filter. Dissolved iron binds to the resin and regeneration cannot remove it, so the softener quietly loses capacity until the water is hard again and the resin has to be replaced. The second mistake is skipping the sediment filter, which lets grit score valves and clog media beds. The third is buying a UV lamp and expecting it to work on cloudy water.
- Treating a sulfur smell with a softener instead of an oxidising filter.
- Installing UV before the water is clear enough for the light to reach bacteria.
- Trusting a free equipment-company test instead of an independent lab panel.
- Forgetting the annual bacteria and nitrate retest after the system is running.
- Ignoring a cracked well cap or casing while adding more filtration.
Testing, Backwashing, and Lamp Schedules That Keep Water Safe
Backwash schedules depend on the media and the iron load, so follow the manufacturer’s settings and adjust if the water starts staining again. Keep a log of test results, cartridge changes, and lamp replacements; a well system is a small utility, and the log is what tells you whether the water is getting better or the equipment is quietly failing.
Well Water Treatment FAQs
Do I need a water test before buying well treatment?
Yes. A comprehensive lab panel from a certified lab costs roughly $150 to $400 and prevents the classic mis-purchases — a softener for sulfur smell, or a carbon filter for iron. Treat the test result, not the symptom.
What removes iron bacteria from well water?
Shock chlorination of the well and plumbing is the usual first step, followed by retesting. If bacteria persist, a licensed well contractor should inspect the casing and seals, and continuous chlorination or an oxidising filter may be needed.
Can a water softener remove iron?
Only small amounts — up to about 2 to 3 parts per million. Above that, iron fouls the resin permanently. A dedicated iron filter must go in front of the softener.
Why does my UV system need a sediment filter first?
Turbidity shields bacteria from ultraviolet light. A 5 micron sediment filter ahead of the UV chamber keeps the water clear enough for the lamp to work, and it protects the quartz sleeve from fouling.
How often should I test my well water?
Test annually for bacteria and nitrates, and run a full panel every few years and after floods, a new pump, or nearby construction. Wells change over time, so an old test describes old water.
What does a whole-house well system cost?
Each treatment stage typically costs a few hundred to a few thousand dollars installed, and a full multi-stage system commonly totals roughly $500 to $3,000 depending on the water quality issues found. Annual maintenance usually runs $200 to $600.
Final Thoughts: Clean Well Water Starts With the Test, Not the Catalog
Well water treatment fails when it starts with a product and succeeds when it starts with a lab panel. Test first, then install the stages in the order that lets each one protect the next: sediment, iron, softening, carbon, and UV last. Fix the wellhead before adding equipment, retest every year, and keep the maintenance log. Do that, and the water at the tap stays clear, stain-free, and safe — without a shelf of filters that were never needed.