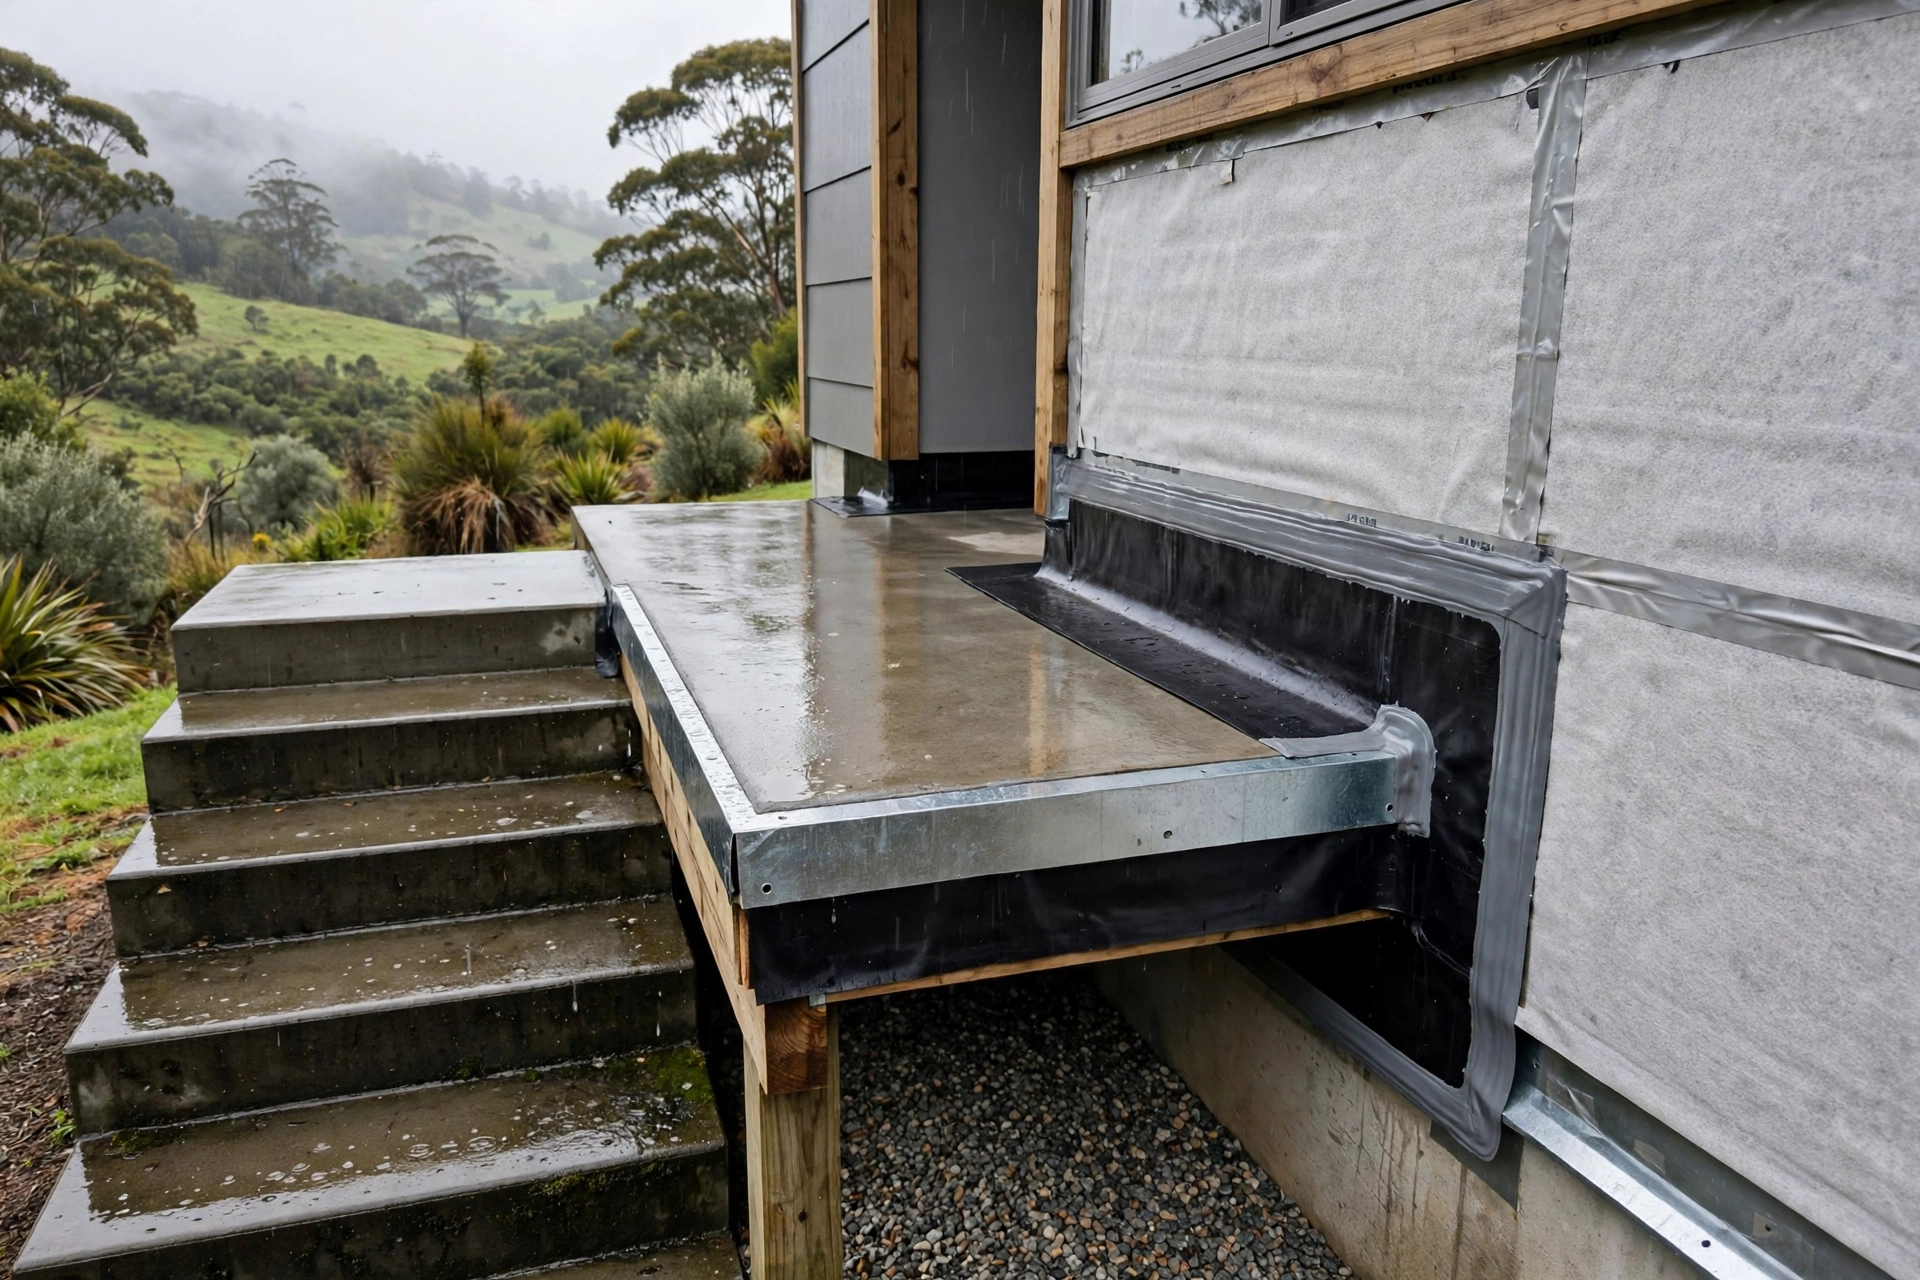
Advanced Residential Exterior Stair Landing Waterproofing Details for Preventing Hidden Structural Moisture Damage
An exterior stair landing takes more punishment than almost any other part of a house. Rain hits it directly, feet grind grit into its surface, freeze-thaw cycles open hairline cracks, and water that finds a way in stays hidden inside the structure for years. The damage it causes — rotted timber, rusted steel, spalled concrete, mould behind the wall — is usually discovered only when the landing starts to feel soft underfoot. The short answer is that a dry landing needs a proper fall, a continuous membrane, protected nosings, and sealed junctions at the wall, and every one of those details must be right or the water will find the one that is not. This guide explains the details that keep a landing dry and the warning signs that show when they have failed.
Landings fail quietly because the waterproofing is buried. Unlike a roof, where a leak shows on the ceiling below, a landing hides its membrane under tiles, screed, or decking, so a small breach can feed moisture into the structure for seasons before anything is visible. That is why the details matter more than the product: the best membrane in the world will fail if the nosing lets water in at the edge, or if the wall junction was never sealed. Getting the details right at build time is far cheaper than rebuilding a landing later.
Where Water Hides in an Exterior Stair Landing
Water reaches a landing from more directions than most homeowners expect. Rain falls directly on the surface, wind drives it against the wall junction, snow melts and sits in low spots, and splashback from the step below throws water onto the nosing with every storm. Once on the surface, water looks for the lowest point and the smallest opening — a hairline crack, a failed grout joint, a gap around a guardrail post — and from there it moves into the structure.
Inside the structure, water does its damage slowly. In timber landings it feeds dry rot that can spread to adjacent joists and wall plates. In concrete it reaches the reinforcement, which rusts, expands, and spalls the cover. In steel-framed landings it corrodes connections that are never inspected. The common thread is time: months or years of hidden moisture before the first visible sign, which is usually a stain, a soft spot, or a railing that has started to move.
Which Waterproofing Layers Actually Protect a Landing
A landing needs a system, not a single coat. The base layer is the structural deck, sloped to drain. Over it goes the waterproofing membrane — a liquid-applied reinforced membrane, a sheet membrane, or a cementitious coating, depending on the deck material and the finish. Above the membrane sits a protection layer, then the wearing surface: tiles, pavers, or a textured coating. Each layer has a job, and skipping one is how water gets through.
Liquid-applied reinforced membranes suit most residential landings because they form a seamless coat that follows the shape of nosings and upstands without joints. Sheet membranes work well on large flat landings but need careful detailing at every seam and edge. Cementitious coatings are common on concrete but are rigid, so they need a crack-bridging layer wherever the structure might move. The choice should follow the deck material and the expected movement, not the price of the tin.
Slope, Drainage, and the Fall That Keeps Water Moving
The cheapest waterproofing on a landing is gravity. A landing that falls away from the building at a gentle slope — roughly one in fifty is a common guide — sheds rain before it can pond, and ponding water is what finds every weakness in a membrane. Where the landing is large, the fall should be built into the structure or the screed, not left to the tile adhesive, because a tiled surface that looks flat will hold water in invisible dips.
Drainage at the edge matters as much as the fall. A drip edge or a small channel at the outer edge carries water clear of the structure below instead of letting it run down the face of the landing and into the joint beneath. On landings that meet a wall, a coved upstand lifts the membrane up the wall so water cannot creep behind it at the junction. Check the fall with a hose after the membrane is fitted and before the finish goes on — it is the last chance to fix a low spot cheaply.
Nosing Details That Stop Cracks Before They Start
The nosing — the front edge of each step and of the landing itself — is the hardest-working part of the whole stair. Every footfall lands on it, and every impact flexes it slightly. Without a proper nosing, that flexing cracks the waterproofing at the edge, and the crack lets water straight into the structure. With a proper nosing, the edge is protected and the membrane stays intact.
Two types of nosing are common. An integral nosing is an extruded aluminium profile with a wide flange that is fixed to the tread after the membrane is laid, then waterproofed over so its fasteners are sealed beneath a second strip of membrane. A topical nosing is fixed on top of the finished system with sealant and nails, which means every fixing penetrates the membrane and relies on caulking. The integral type costs more and lasts far longer, and on an exterior stair it is the one to choose.
- Use an integral aluminium nosing with a wide flange, waterproofed over its fixings.
- Keep the nosing continuous across the full width of the landing, with no gaps at the ends.
- Give the nosing a slight drip lip so water falls clear of the riser below.
- Never fix a topical nosing through the membrane with unsealed nails or screws.
- Check nosings every year for movement, loose fixings, and cracked sealant.
The nosing also protects the people using the stair. A worn or missing nosing leaves a sharp, crumbling edge that chips underfoot and becomes a trip hazard, and the same damage that makes it unsafe is the damage that lets water in. A nosing that is sound, secure, and sealed is doing two jobs at once, and both of them matter.
Membrane Choices for Concrete, Timber, and Steel Landings
The deck material decides the membrane. Concrete landings suit liquid-applied reinforced systems and cementitious coatings, provided cracks are repaired first and the surface is properly prepared — grinding off old coatings, filling hollows, and priming. Timber decks need a flexible membrane that moves with the boards, usually a liquid-applied system over a suitable board, because a rigid coating will crack at the first seasonal movement. Steel-framed landings need a membrane that bonds to metal and tolerates vibration.
Preparation is half the job on every deck type. A membrane applied over dust, loose material, or a damp surface will not bond, and the failure will show as blisters or peeling within a season. The surface must be clean, dry, and sound, with falls corrected and upstands formed before the membrane goes on. Rushing the preparation to save a day is the most expensive shortcut in landing waterproofing.
| Deck material | Membrane that suits it | Watch out for |
|---|---|---|
| Concrete | Liquid-applied reinforced | Cracks must be repaired first |
| Timber boards | Flexible liquid system | Movement cracks rigid coatings |
| Steel frame | Metal-bonding membrane | Vibration loosens poor bonds |
| Existing tiles | Overlay liquid system | Old waterproofing must be sound |
Sealing the Wall-to-Landing Junction So Water Cannot Creep Behind
The junction where the landing meets the house wall is the most common leak path, and the hardest to fix after the fact. Water running down the wall, or ponding against it, will find any gap in the seal and travel behind the membrane, where it can soak the wall plate and the framing for years. The detail that prevents it is simple in principle: the membrane must turn up the wall as a continuous upstand, with no break, and the top of the upstand must be sealed and protected by flashing.
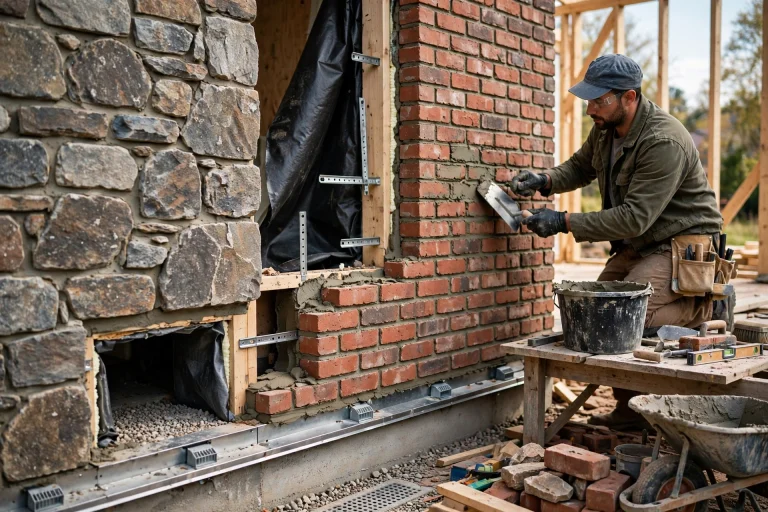
On brick walls the upstand needs a proper termination — a reglet cut into the mortar joint, or a metal flashing that covers the top edge so water cannot run behind it. On rendered or clad walls the flashing must lap over the membrane and under the cladding. Sealant alone is not a detail: it ages, cracks, and fails, and when it does the water goes straight behind the membrane. A mechanical flashing over a sealed upstand is the detail that lasts.
Guardrail Posts, Penetrations, and the Leaks They Invite
Every guardrail post is a hole through the waterproofing, and every hole is a future leak if it is not detailed properly. Posts should be fixed to solid blocking or to the structure below, never simply bolted through the membrane into a hollow deck. The membrane should be dressed up around the post base, sealed with a compatible collar or boot, and protected by a cover plate that sheds water away from the penetration.
The same rule applies to any other penetration: a light fitting, a drain outlet, a pipe that passes through the landing. Each one needs its own detail, made with materials compatible with the membrane, and each one should be inspected annually. A post that has started to wobble is not just a safety problem — the movement is opening the seal around its base with every push, and water is already following it in.
- Fix guardrail posts to solid blocking or structure, never through a hollow deck.
- Dress the membrane up around each post base and seal it with a compatible collar.
- Fit a cover plate that sheds water away from the penetration, not towards it.
- Inspect every penetration annually for movement, cracked sealant, and staining.
- Treat a wobbling post as an urgent waterproofing repair, not just a safety fix.
Penetrations are also the place where different trades collide. The metalworker fits the rail, the waterproofer fits the membrane, and neither owns the junction between them. On a well-run job, the detail is agreed before either trade starts, and the membrane is fitted around a post base that was designed for it. On a badly run job, the post is bolted through a finished membrane and the leak is discovered two winters later.
Spotting Hidden Moisture Before the Structure Suffers
The earliest signs of a landing leak are subtle, and they reward the homeowner who looks. A dark stain on the soffit below the landing, a musty smell in the room behind the wall, paint peeling on the wall beneath the landing, or a patch of efflorescence on the brickwork are all worth investigating. A moisture meter, pressed against the soffit or the wall plate, will confirm what the eye suspects.
The other early sign is movement. A nosing that rocks, a tile that sounds hollow when tapped, a guardrail post that flexes more than it used to — all of these mean water has already reached the structure and something has softened or corroded. At that point the repair is no longer a reseal; it is an investigation, and the sooner it starts the smaller it stays. A landing that is inspected every spring, after the winter rains, rarely reaches the stage where it needs rebuilding.
| Warning sign | What it may mean | What to do |
|---|---|---|
| Stain on the soffit below | Water passing through the deck | Moisture-meter check, then open up |
| Hollow-sounding tile | Membrane or screed debonded | Lift and inspect the area |
| Wobbling guardrail post | Fixing corroded or rotted | Treat as urgent, inspect base |
| Peeling paint on the wall | Water behind the upstand | Check the wall junction seal |
Exterior Stair Landing Waterproofing Questions Homeowners Ask
These are the questions that come up most often when a landing starts showing its age.
Can I waterproof a landing without removing the tiles?
Sometimes. If the existing membrane is sound and only the surface coating has failed, a liquid overlay system can be applied over the tiles after proper preparation. If the membrane itself has failed, or the tiles are hollow, the only lasting fix is to strip back to the deck and start again.
How long should landing waterproofing last?
A properly detailed system typically lasts fifteen years or more, and often far longer. Its life depends on the membrane, the detailing at nosings and junctions, and whether it is inspected and maintained. Systems that are never inspected usually fail at a detail, not in the middle of the membrane.
Why is water ponding on my landing?
Usually because the fall is wrong or has been lost — the screed has settled, the tiles were laid flat, or a repair built up a low spot. Ponding water finds every weakness in the membrane, so the fall should be corrected, not just the membrane patched. A levelling mortar can restore the fall without a full rebuild.
Do I need a professional to waterproof a landing?
For a small landing with a simple detail, a competent DIYer can follow a manufacturer’s system. For landings over living space, structural landings, or any landing with guardrail penetrations and wall junctions, a specialist is worth the cost — the details are where the job succeeds or fails.
What is the first thing to check on an old landing?
The nosings and the wall junction. Walk the nosings and feel for movement, look for cracks in the coating at the edge, and check the seal where the landing meets the wall. Those two places account for most landing leaks, and they are the cheapest to fix early.
Final Thoughts: A Dry Landing Protects the Whole Staircase
An exterior stair landing is a small area with a large responsibility. It carries every footstep, every storm, and every freeze, and the water it lets through does its damage where nobody can see it — in the joists, the wall plate, and the reinforcement. A landing that is sloped to drain, sealed with a continuous membrane, protected at its nosings, and flashed properly at the wall will stay dry for decades. The details are not glamorous, but they are the difference between a staircase that lasts and one that quietly rots from the inside out.