Modern Residential Utility Access Flooring Systems for Concealing Pipes Without Blocking Future Repairs
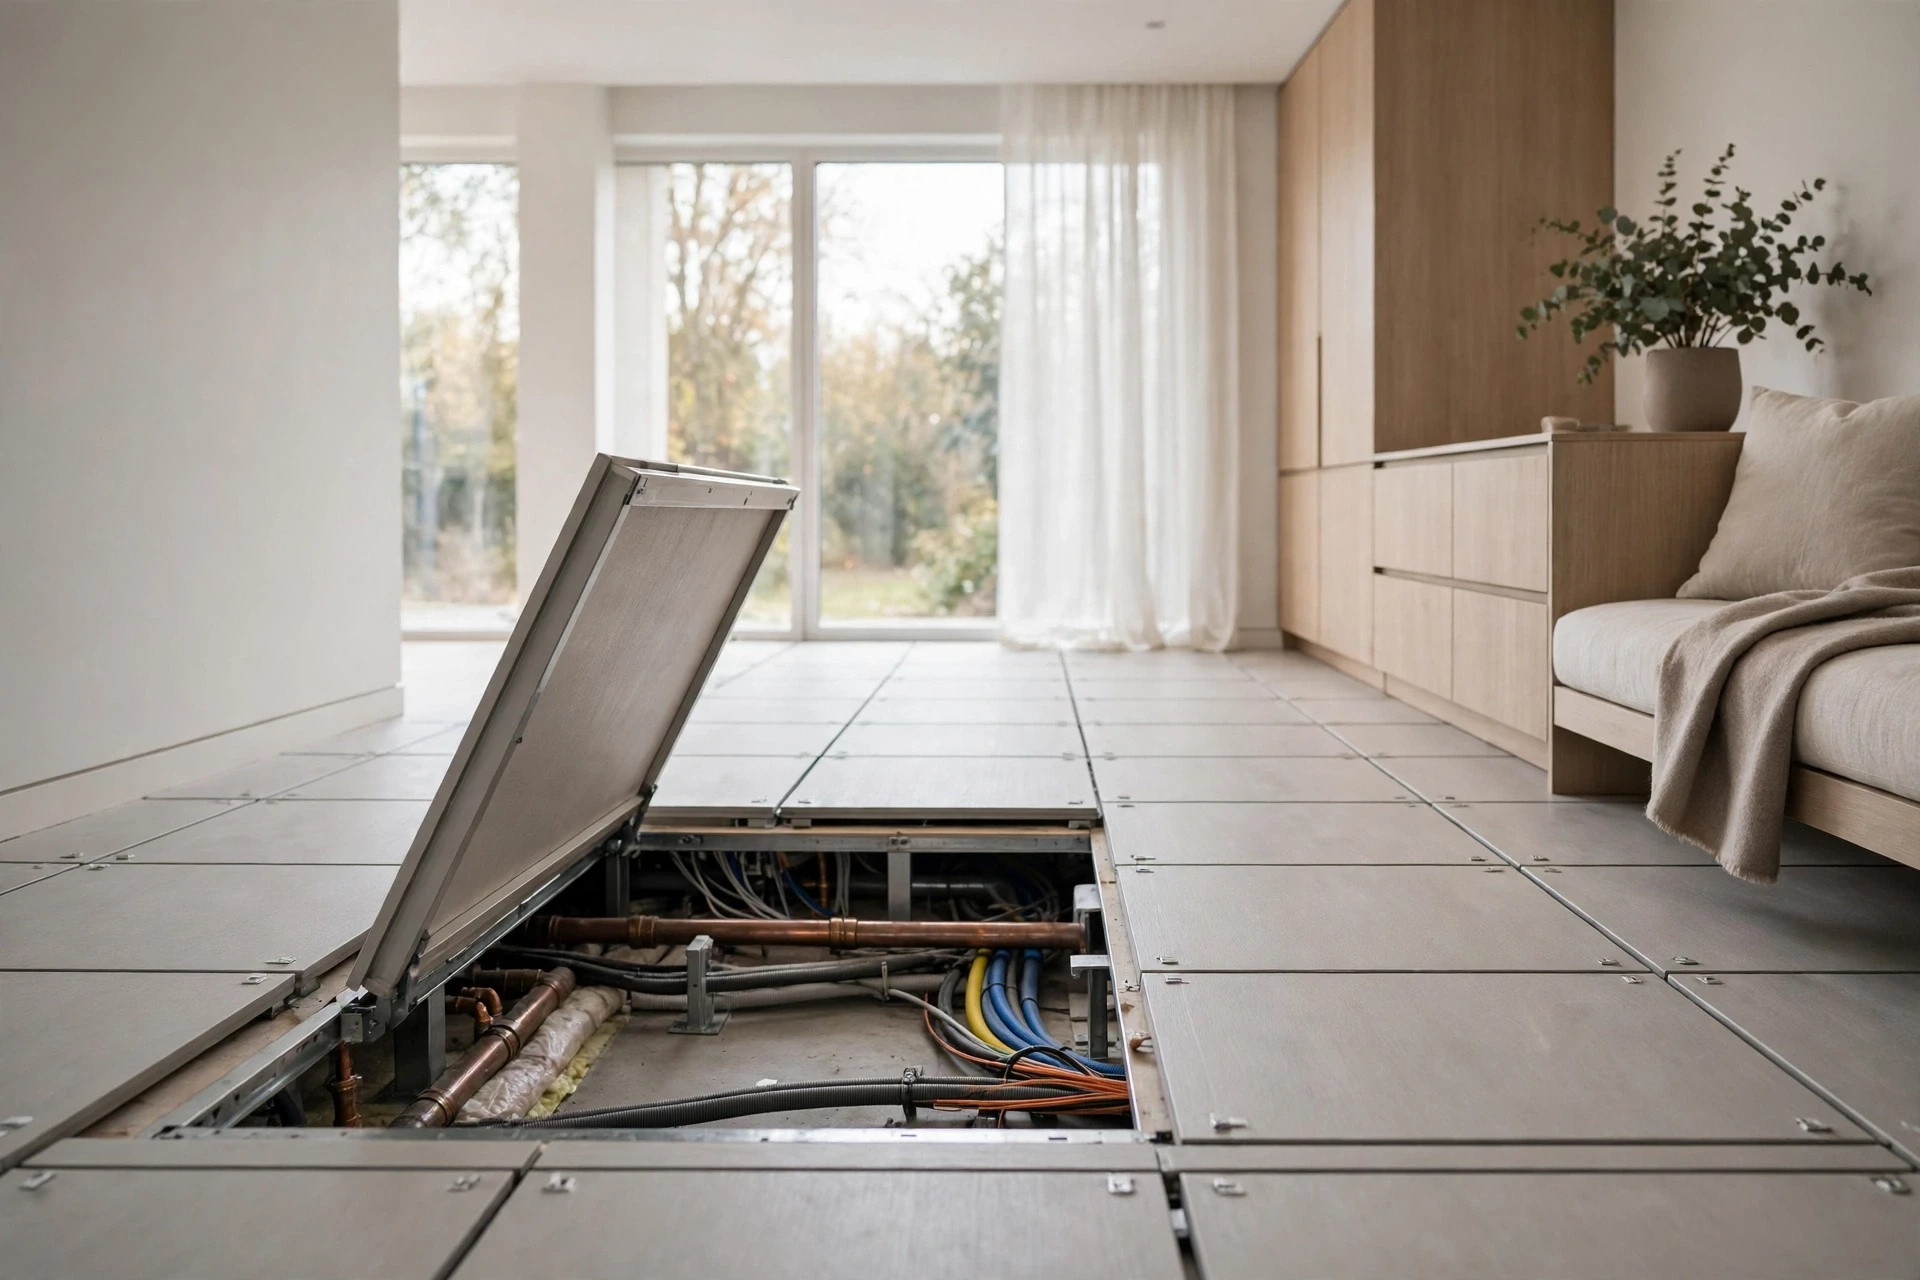
A utility access floor is a raised, removable floor surface that hides pipes, cables and drains in the void beneath it while leaving every one of them reachable — lift a panel and the service is in your hands, with no cutting, no demolition and no patching afterwards. For homeowners tired of chasing a leak through a tiled bathroom floor or a kitchen ceiling, it is the most practical answer to a simple problem: the services a house needs are ugly, they need maintenance, and burying them in concrete makes both of those facts worse. This guide explains how access flooring works in a home, how to plan the void, which panels and pedestals suit residential loads, and how to keep the hidden space dry, quiet and genuinely accessible for decades.
Why Homeowners Are Hiding Pipes Under Their Feet
Every homeowner who has paid to open a tiled floor for a ten-minute pipe repair understands the case for an access floor. In a conventional build, pipes are buried in screed or chased into walls, which looks clean until the day something leaks, a valve seizes or a bathroom layout changes. Then the clean finish becomes the enemy: tiles are broken, screed is cut, dust fills the house, and the repair costs ten times what the pipe fitting was worth. An access floor reverses that logic by accepting that services need attention and designing the floor to allow it.
The benefits go beyond repair access. A raised floor creates a level surface over an uneven slab without grinding or levelling compound, it gives underfloor heating pipes and manifolds a home that does not require deep screed, and it lets services be rerouted later when a kitchen or bathroom changes — a flexibility that matters more with every year a home is lived in. The trade-off is height: even a low system adds roughly 100 to 200 millimetres to the floor level, which affects door thresholds, stair nosings and ceiling heights, so the decision has to be made early, before the rest of the fit-out is planned around a floor level that is about to change.
What Sits Beneath a Raised Floor, and Why It Matters
The void beneath an access floor is not empty space; it is a working service zone, and what you put in it decides how well the system performs. Water supply pipes run in the void on clips, drainage pipes run with a fall of at least 1 in 40 toward the stack, electrical cables run in trunking or on trays, and underfloor heating manifolds sit where they can be reached without moving furniture. The void also carries air: it is the route for ventilation to the floor zone and the path for any leak to show itself, which is why the void needs both a way in and a way for water to escape.
The most important rule of the void is that it is a service space, not a storage space. Boxes, paint tins and offcuts stored under the floor crush insulation, block access to valves and hide leaks until the damage is done. Keep the void clear, keep a plan of what runs where, and keep the access panels where the plan says they are — a hidden service is only accessible if someone can find it, and the person who needs it in five years' time will not be the person who installed it. A laminated plan fixed inside the access panel cupboard is the cheapest insurance the system can have.
Pedestals, Panels and the Anatomy of an Access Floor
A residential access floor has three parts, and each one does a different job. The pedestals are height-adjustable steel feet that stand on the structural slab and carry the panels; they are levelled individually, which is how the system creates a flat floor over a slab that is anything but flat. The panels are the walking surface — usually a steel-encapsulated chipboard or calcium sulphate core with a finish of tile, vinyl or wood — and they lift out individually with a suction tool. The stringers, where used, are the cross-members that tie the pedestal heads together and stiffen the floor against rocking.
Panel choice is a balance between load, finish and access. A bathroom panel needs to carry a cast-iron bath and resist moisture, so a dense calcium sulphate core with a tiled finish is the usual answer; a utility room can use a lighter chipboard panel with vinyl, which is easier to lift. Specify the panel by its load rating, not by its appearance — residential floors should handle the point loads of a washing machine, a bath full of water and a person standing on one heel, and a panel chosen for looks alone will flex, squeak and eventually crack under that load.
| Panel type | Core | Best use | Load and notes |
|---|---|---|---|
| Steel-encapsulated chipboard | Chipboard with steel tray | Utility rooms, dry areas | Good general load; keep dry; easy to lift |
| Calcium sulphate | Dense mineral core | Bathrooms, kitchens | High load and moisture resistance; heavier to lift |
| Porcelain tile on pedestal | 20 mm porcelain tile | Terraces, wet rooms | Excellent water resistance; needs a level grid |
| Vinyl-finished access panel | Chipboard or mineral core | Bedrooms, home offices | Quiet underfoot; simple to replace if damaged |
Always check the manufacturer's point-load rating for the heaviest single item the floor will carry, such as a filled bath or a washing machine on a spin cycle.
Planning the Void: Routing Pipes So Every Run Stays Reachable
The void is planned before the first pedestal goes down, because the routes of the pipes decide where the pedestals can go, and the pedestals decide where the panels lift. Start with the drainage, since it has the least flexibility: every waste pipe needs its fall, and the fall sets the minimum void depth along its run. Then route the water supply, keeping hot and cold runs separated so the cold does not pick up heat from the hot, and keep every joint, valve and manifold on a line that a panel can reach — a valve under a fixed panel is a valve that might as well be buried in concrete.
- Map the drainage first — its fall fixes the minimum void depth, and everything else routes around it.
- Keep every joint reachable — no buried fittings under fixed panels; joints, valves and manifolds sit on access lines.
- Separate hot and cold runs so the cold supply does not warm up and the hot does not lose heat into the void.
- Leave a service corridor — a clear lane through the void, at least one panel wide, so a person can reach any point without lifting the whole floor.
Draw the plan at full scale on paper before ordering a single pedestal, and mark every access panel on the finished floor plan so the homeowner knows which panels lift and which are fixed. A plan that exists only in the installer's head is not a plan; it is a memory, and memories leave with the installer. The finished floor should tell its own story: a discreet marker, a different tile or a note on the room plan showing which panels are the access ones, so the next person to need a valve can find it in minutes rather than hours.
Access Panels That Disappear Into the Floor — Until You Need Them
A good access panel is invisible in daily use and obvious when you need it, and the trick is in the detail. Panels that carry the same finish as the surrounding floor — the same tile, the same vinyl, the same wood — disappear into the pattern, especially if the joints are kept tight and the panel edges are finished to match. The lift point should be a suction cup or a small recessed handle rather than a visible finger hole, which collects dirt and breaks the finish.
- Match the finish — the access panel carries the same tile or vinyl as its neighbours, so it disappears into the floor.
- Keep a suction lifter on site — panels are lifted with a suction tool, not a screwdriver, which damages edges.
- Label the access lines — a small mark on the skirting or a note on the room plan shows which panels lift.
- Never glue or grout an access panel in — adhesive and grout turn a removable panel into a fixed one, defeating the whole system.
The discipline that keeps access panels accessible is a simple one: nothing gets fixed to them, nothing gets stored on top of them, and nothing gets built over them. A washing machine parked on an access panel is a panel that cannot be lifted, and a kitchen island built across an access line is a service that cannot be reached. Plan the furniture around the access lines, not the other way round, and the floor will still be doing its job in twenty years' time.
Moisture in the Void: Keeping the Hidden Space Dry
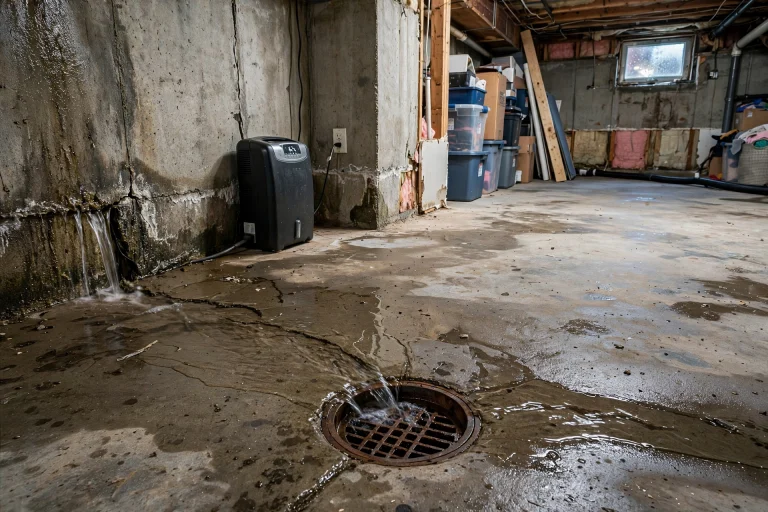
The void beneath a raised floor is the one place in the house where a leak can hide longest, because nobody looks there until the damage is visible elsewhere. A slow drip from a joint can run along the slab for weeks, soaking insulation and corroding pedestal feet, before it shows as a stain on a ceiling below. That is why moisture control in the void is not an afterthought — it is part of the design, and it has three parts: keeping water out, detecting it early, and giving it somewhere to go.
Keeping water out starts with the slab: the structural floor should be dry, level and sealed before the pedestals go down, and any pipe passing through the slab should be sleeved and sealed. Detection is best done with a simple water sensor — a small battery-powered alarm placed at the lowest point of the void, or a wired sensor tied into the home's leak detection system — because a sensor that shouts at the first drip saves the floor. And the void needs a drain path: a slight fall in the slab toward a floor drain or a low point where water can be seen and mopped, so a leak announces itself instead of pooling silently under the panels.
| Moisture risk | Where it comes from | Prevention |
|---|---|---|
| Slow joint leak | A fitting that weeps over weeks | Water sensor at the lowest point of the void |
| Condensation | Warm moist air meeting a cold slab | Insulate the slab; ventilate the void |
| Spill from above | Bath or appliance overflow | Sealed panel joints in wet areas; drain path in the slab |
| Rising damp | Ground moisture through the slab | Damp-proof membrane under the pedestals |
Check the void at least once a year by lifting an access panel and looking — a dry void is a healthy floor, and a damp one is a warning worth heeding.
A Maintenance Map Every Homeowner Should Keep
The difference between an access floor that serves a home for decades and one that becomes a mystery is a single piece of paper: the maintenance map. It shows the panel layout, marks every access panel, lists what runs beneath each one, and records the location of every valve, manifold and drain. It lives in the house, not in the installer's van, and it is updated whenever a service changes. Without it, the floor's great advantage — access — is wasted, because nobody knows where to lift.
The map should be made on the day the floor is finished, while the routes are still visible, and it should be checked once a year when the void is inspected. Lift two or three panels a year, look, and put them back — that small habit catches the weeping joint, the corroding pedestal and the mouse nest before any of them becomes a problem. An access floor is not a fit-and-forget product; it is a maintainable system, and the maintenance is the point.
Utility Access Flooring FAQs
How much height does a residential access floor add?
A low residential system typically adds 100 to 200 millimetres to the finished floor level, depending on the void depth the services need. Drainage runs with their required fall usually set the minimum depth. Plan thresholds, doors and stair nosings around the new finished level before work starts, because fixing them afterwards is far more expensive.
Can an access floor carry a bath or a washing machine?
Yes, provided the panels are specified by their load rating. A bathroom needs a dense calcium sulphate panel that handles the point load of a filled bath, and a washing machine needs a panel rated for its weight on a spin cycle.
Will a raised floor be noisy to walk on?
It should not be, if it is built properly. Noise comes from pedestals that were never levelled, missing gaskets on the pedestal heads, or panels that have swollen with moisture. Each pedestal must be levelled and locked, the manufacturer's pad must sit between pedestal and panel, and the void must stay dry.
What happens if a pipe leaks under an access floor?
A leak in the void is far easier to deal with than one buried in screed: lift the access panel, find the joint and repair it, with no demolition and no patching. The risk is a leak going unnoticed, so fit a sensor at the lowest point of the void and lift a panel to inspect it.
Can access flooring be fitted in a retrofit, or only in new builds?
It works in both, and it is often better in a retrofit, because it creates a level floor over an uneven slab and gives old pipes a new, reachable home without chasing walls or breaking screed. The main constraints are the added height and the ceiling height that remains after the raise, so check both before committing.
Final Thoughts: Build the Floor Around the Pipes, Not Over Them
A utility access floor is a bet that the services in a home will need attention — and it is a bet the house always wins, because pipes leak, layouts change and valves seize. The cost is a little height and a little planning; the reward is a floor that opens like a drawer whenever the house needs work, and closes again without dust, demolition or patching. Plan the void first, keep the access lines clear, keep the map in the house, and the floor will still be serving the home long after the pipes beneath it have been repaired twice over.