Advanced Exterior Masonry Joint Repair Techniques for Homes Exposed to Repeated Rainwater Saturation
On a home that faces repeated wind-driven rain, the mortar joints are the wall's first line of defence — and the first thing to fail. When joints crumble, recede or turn to sand, rainwater soaks into the brick or stone behind them, freezes in winter, and prises the face off the masonry unit by unit. The repair is called repointing: cutting out the failed mortar to a sound depth and packing in new mortar matched to the wall. Done well, it returns a saturated wall to a cycle of wetting and drying that the building can live with for another generation; done with the wrong mix or the wrong depth, it traps moisture and makes the damage worse.
Reading a Wet Wall: What the Joints Are Telling You
Before any tool touches the wall, spend time reading it, because the joints record the building's whole moisture history in a language that is easy to learn. Sound mortar is firm under a thumbnail and holds its profile against the brick face. Failing mortar crumbles when scraped, sounds hollow when tapped with a small hammer, and has receded more than about ten millimetres from the face, leaving a ledge where rainwater sits instead of running off. White salt deposits, known as efflorescence, mark the places where water has travelled through the wall and evaporated at the surface, leaving its dissolved salts behind.
The pattern of failure matters as much as the failure itself. Joints that have failed only on the windward elevation, or only below a leaking gutter, are telling you the cause is local and fixable — sort the gutter, and the wall may need only a patch. Joints that have failed evenly across every elevation suggest a systemic problem, such as a cement pointing applied decades ago that has trapped moisture in the brick, or a wall that has been saturated for so long that the mortar has simply dissolved. Map the damage on paper before you start, marking each elevation and each patch, because a repair planned from a map is a repair that gets the worst walls first and the budget spent where it matters most.
How Repeated Rain Saturation Breaks Mortar Down
Mortar fails in wet walls through a cycle that repeats with every storm. Rainwater is driven into the joints by wind, and the mortar — which is deliberately softer and more permeable than the brick — absorbs it. In dry weather the water evaporates out again through the joint face, and the cycle is harmless. But when the rain keeps coming, or when the joint is sealed with a hard cement pointing that blocks evaporation, the wall stays wet. Then the first frost arrives, the water inside the mortar and the brick face freezes and expands by about nine percent, and the expansion prises tiny flakes off the surface. Each winter removes a little more, and after enough winters the joint is a hollow channel and the brick face is spalling away.
Saturation also attacks the mortar chemically. Rainwater is slightly acidic, and in polluted air it carries sulphates that react with the compounds in cement, weakening the binder that holds the sand together. Biological growth adds its own damage: moss and algae hold moisture against the joint long after the rain stops, and their rootlets work into the surface. The lesson is that the joint is meant to be the sacrificial part of the wall — softer than the brick, so that moisture concentrates in the mortar and evaporates there, sparing the masonry units. A repair that makes the joint harder than the brick reverses that protection and moves the damage into the bricks themselves, which is far more expensive to fix.
Finding the Water Before You Close the Joints
Repointing a wall that is still being soaked by a leaking gutter is like bailing a boat without plugging the hole, so the first job is to find every water source and fix it. Walk the roofline and check the gutters and downpipes first: a blocked gutter overflows directly onto the brickwork below it, and a leaking downpipe joint saturates the wall at the base, where the damage is hardest to see. Check the ground as well — soil or paving that slopes toward the wall keeps the base courses permanently damp, and a wall with no damp-proof course will draw that moisture upward into the lowest joints.
Look at the details around openings, because windows and doors are the usual suspects. A failed sealant joint around a window frame, a sill that slopes toward the wall instead of away from it, or a lintel with no drip detail can each deliver a steady stream of water into the masonry below. Fix the water sources first, then repoint, and give the wall a dry spell to prove the diagnosis — if the wall dries out noticeably within a few weeks of the gutter repair, the pointing was a symptom, not the disease, and a lighter repointing may be all the wall needs.
| Water source | Where it shows | Fix before repointing |
|---|---|---|
| Blocked or leaking gutter | Saturated band below the eaves | Clear, repair or replace the gutter and check the fall |
| Downpipe leaking at a joint | Wet patch at the base of the wall | Reseal or replace the joint; check the shoe discharges clear |
| Ground sloping toward the wall | Damp lowest courses, salt staining | Re-grade or add a drainage channel away from the wall |
| Window sill sloping inward | Wet masonry below the opening | Re-bed the sill with a fall away from the wall |
| Failed sealant at a frame | Damp around the opening | Cut out and renew the sealant joint |
A wall that stays wet after the water sources are fixed may have a deeper problem, such as a failed damp-proof course or rising damp, which needs specialist advice.
Matching Mortar to the Wall You Already Have
The single most important decision in a joint repair is the mortar mix, and the rule is simple: the new mortar must be softer and more permeable than the masonry it sits between. For a wall built before roughly 1920, that almost always means a lime mortar — typically one part hydraulic lime to three parts sharp sand — because the original pointing was lime, and the soft bricks of the period depend on the joints to breathe. Using a standard cement mortar on old soft brickwork traps moisture in the brick, and the face of the brick blows off within a few winters while the hard cement joint sits there untouched, which is exactly the wrong outcome.
For a modern wall built with hard engineering bricks, a cement-based mix is appropriate — one part cement to five or six parts soft sand, or a ready-mixed pointing mortar from the merchant. The distinction is not about old versus new as a matter of taste; it is about physics. Test before you commit: take a small sample of the existing mortar, crush it, and note whether it is soft and chalky (lime) or hard and grey (cement).
Raking Out Failed Joints Without Bruising the Brick
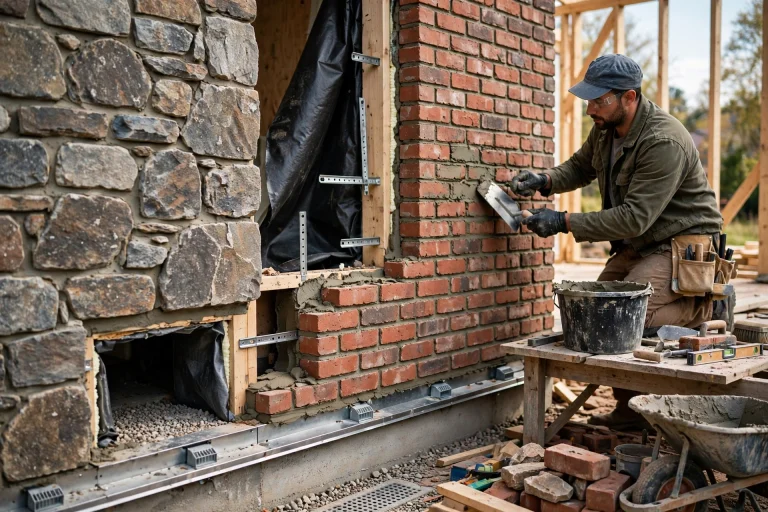
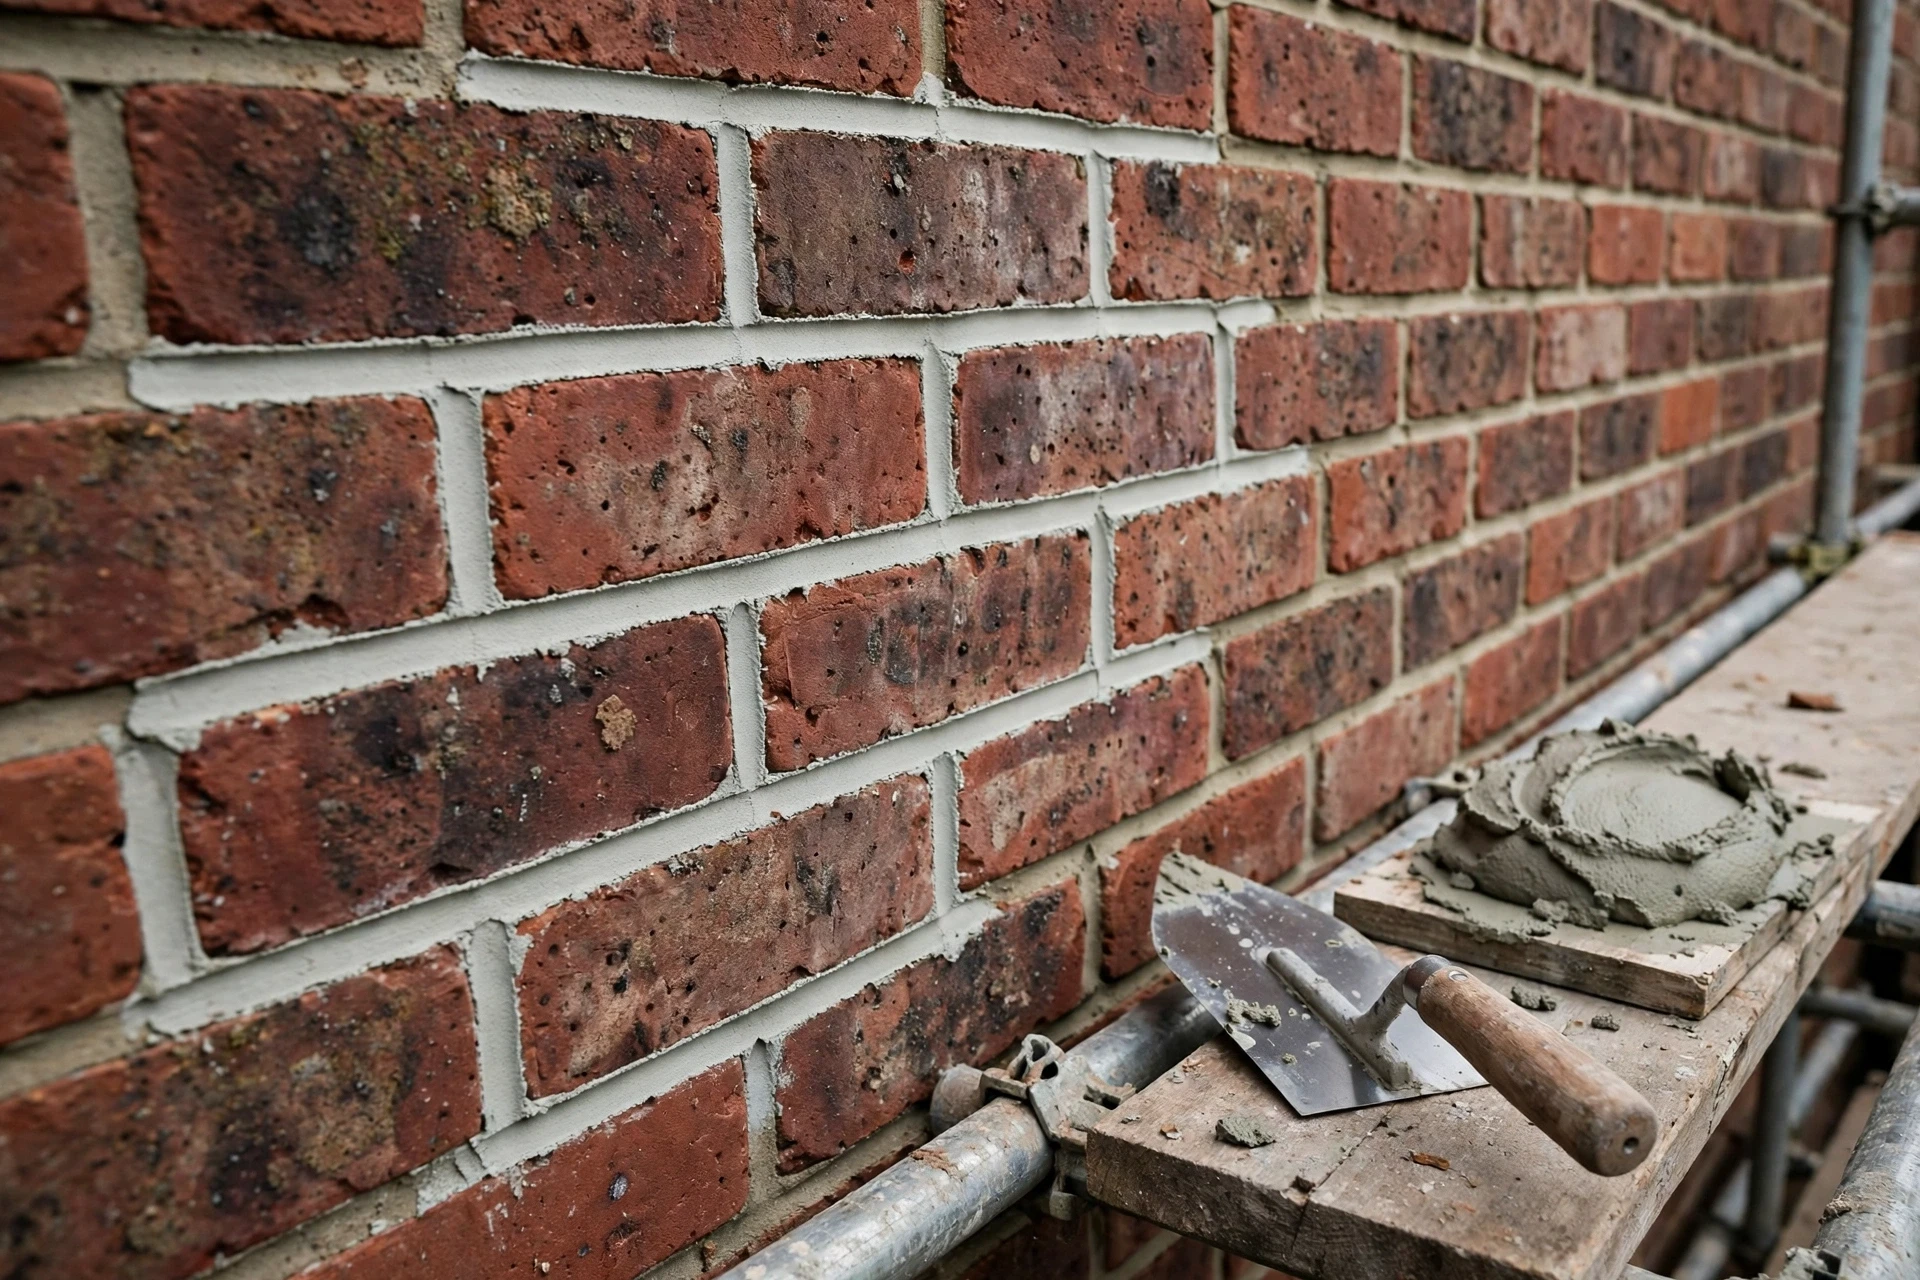
Removing old mortar is where most repointing jobs are won or lost, because the goal is to take out the failed material and nothing else. The target depth is at least fifteen millimetres, ideally twenty, and two to three times the joint width on wider joints — enough for the new mortar to key in and bond. Work along the horizontal bed joints first, then the vertical perpends, using a plugging chisel or a mortar rake, and keep the tool in the joint rather than levering against the brick arris, which chips the edge and leaves a scar no pointing can hide.
Power tools have their place on large areas of hard cement pointing, but they are dangerous on soft historic brick: a grinder in inexperienced hands cuts a groove into the brick face in a second, and the damage is permanent. If the wall is old or the bricks are soft, rake by hand — it is slower, but the wall will thank you for it. Whatever the method, finish by brushing out every trace of dust and loose debris with a stiff brush, because new mortar will not bond to a dusty surface, and dampen the joints with a sprayer immediately before pointing so the dry background does not suck the moisture out of the fresh mortar before it can cure.
- Rake to at least 15 mm, ideally 20 mm, so the new mortar has depth to bond into.
- Work bed joints first, then perpends, and keep the tool inside the joint, never levering on the brick edge.
- Brush out all dust and dampen the joint just before pointing, so the fresh mortar cures slowly instead of drying out.
A clean, damp, square-sided joint is the foundation of the whole repair, and it is the step most often rushed. The difference between a joint that lasts twenty years and one that falls out in two is usually decided in this preparation stage, before a single trowel of new mortar is mixed. Take the time to get the raking right, and the pointing itself becomes the easy part.
Pointing in Layers: A Sequence That Holds in Driving Rain
New mortar should be mixed in small batches — a bucket at a time — and kept stiff enough to hold its shape on the trowel rather than slumping. If the joint is deep, more than about twenty-five millimetres, fill it in two passes: pack the first layer in to within ten millimetres of the face and let it firm up before adding the finishing layer, because a single deep fill shrinks as it cures and leaves a gap behind the face. Press the mortar firmly into the joint with a pointing trowel or a hawk, working it into the corners so there are no hidden voids where water can sit.
Timing the finish is a matter of touch rather than clock. When the mortar is firm but not fully hard — you can press it with a thumb without it sticking, usually an hour or two after application depending on the weather — it is time to strike the joints. The most common finish on exposed walls is a slightly weatherstruck joint, where the top edge of the mortar is pressed back so rainwater sheds away from the face instead of sitting on it. Never finish joints in cold weather or when rain is due, because frost cracks fresh mortar and rain washes it out of the joint before it has set, and a ruined finish is worse than no finish at all.
Where Water Comes Back After a Good Repoint
A well-executed repointing can still be followed by damp patches, and the cause is usually not the pointing at all. The most common culprit is a detail the repointing did not touch: a chimney flashing that has lifted, a parapet coping that no longer sheds water, or a wall that meets a roof without a proper abutment flashing. Water entering at the top of a wall travels down through the masonry core and emerges as a damp patch far below the entry point, which makes it look like the new pointing has failed when it has done its job perfectly.
The second common cause is the wall's own drying time. A wall that has been saturated for years holds a large volume of water in its core, and even after the joints are sealed and the water sources fixed, that stored moisture can take months to dry out. Damp patches that fade slowly over a dry summer are the wall drying, not the repair failing. Give the wall a full drying season before judging the work, and use a moisture meter on the internal face to track the trend — a steadily falling reading is success, even if the wall is not yet dry.
| Damp returns as | Likely cause | What to check |
|---|---|---|
| Patch high on the wall | Failed chimney or parapet flashing | Flashing laps, coping joints and abutments |
| Patch below a window | Sill or frame seal failure | Sill fall, sealant joints and lintel drips |
| Patch at the base | Ground water or rising damp | Ground levels, drainage and damp-proof course |
| Patch fading over months | Stored moisture drying out | Moisture meter trend on the internal face |
If damp appears in a new place after repointing, check the details above the patch first — water travels down inside the wall and emerges well below its entry point.
Masonry Joint Repair FAQs
How deep should old mortar be raked out before repointing?
Rake out failed mortar to a depth of at least fifteen millimetres, ideally twenty, and two to three times the joint width on wider joints. That depth gives the new mortar enough material to bond and key into the wall.
Can I use cement mortar to repoint an old brick wall?
Only if the wall is built of hard modern bricks. On walls built before about 1920, cement pointing traps moisture in the soft bricks and causes the brick faces to blow off, while the cement joint survives untouched. Walls need a lime mortar that is softer and more permeable than the brick, so moisture evaporates through the joints.
Why does repointing fail in driving rain?
The usual causes are a mortar harder than the brick, joints raked too shallow, recessed profiles that hold water on a ledge, or water sources such as leaking gutters that were never fixed. Any one of these will undo good pointing.
How long should a repointed wall take to dry out?
A wall that has been saturated for years can take a full drying season, often several months, to shed its stored moisture, even after the joints are sealed and the water sources fixed. Damp patches that fade slowly over a dry summer are the wall drying, not the repair failing.
When should I call a professional instead of repointing myself?
Call a professional mason for whole elevations, walls above one storey, historic or listed buildings, and any wall where the bricks are spalling or the structure is in doubt. Scaffolding, mortar matching and working at height are all specialist skills, and a poor repointing on a historic wall can cost far more to undo.
Final Thoughts: The Joint Is the Wall's Way of Breathing
A masonry wall is not a solid block; it is a system of hard units and soft joints, and the joints do the breathing. Repointing done well restores that system: water gets in, water gets out, and the bricks stay dry enough to last.