Basement Moisture Control Methods for Finished Residential Living Areas and Below Grade Interior Spaces
Basement moisture control decides whether a finished basement stays comfortable for decades or becomes a moldy teardown within a few years. Below-grade rooms sit against damp soil, cold concrete, and groundwater pressure, so they need a layered defense: stop water outside the foundation, relieve the pressure pushing water in, and keep indoor humidity low enough that mold cannot start. This guide covers each method in order of impact, what each costs, and the mistakes that trap moisture inside finished walls.
Basement Moisture Control: The Short Answer
The most reliable basement moisture control plan has four layers. First, move roof and surface water away with working gutters, downspouts discharging at least ten feet from the foundation, and soil sloping away from the walls. Second, relieve hydrostatic pressure with an interior perimeter drain tied to a sump pump with battery backup. Third, hold finished-space humidity between 30 and 50 percent with a dedicated basement dehumidifier. Fourth, finish with moisture-tolerant assemblies that dry toward the interior. Sealants and dehumidifiers alone cannot fix bulk water entry.
Where Basement Moisture Comes From
A finished basement feels damp for four different reasons, and each needs a different fix. Diagnosing the source before spending money is what separates a one-time repair from a recurring problem.
Bulk Water Leaks
Liquid water enters through cracks, the floor-wall joint, window wells, or gaps around pipes. It shows up as puddles or wet spots after rain. No coating or dehumidifier overcomes an active leak; the entry point or the pressure behind it must be fixed.
Hydrostatic Pressure
Saturated soil pushes water against walls and up under the slab. Basements that are dry in summer but seep each spring, or weep along the base of walls after heavy rain, are usually fighting hydrostatic pressure rather than a single crack.
Water Vapor Through Concrete
Concrete is porous, so soil moisture migrates through it as vapor even with no visible leak. White, powdery efflorescence on a wall is the signature: water carries salts through the concrete and leaves them behind. In a finished basement this vapor can keep wall cavities damp enough for mold while the floor looks dry.
Indoor Condensation
In summer, warm humid air condensing on cold concrete walls or uninsulated ducts can make a basement feel wettest in July with no rain at all. It appears as general dampness or sweating pipes rather than one wet spot.
Fix the Exterior First
Exterior water management is the cheapest, most effective layer. A roof sheds hundreds of gallons in one storm, and every gallon dumped by the foundation must go somewhere.
Clean and Extend Gutters and Downspouts
Keep gutters clear so overflow cannot spill against the foundation, and extend downspouts to discharge at least ten feet away, with four to six feet as a minimum. Buried extensions with pop-up emitters work where surface extensions are a tripping hazard.
Slope Soil Away From the House
Grade the ground to fall roughly six inches over the first ten feet from the foundation. Low spots, mulch piled against siding, and patios pitching toward the house all funnel water to the wall. Regrading disrupts landscaping but costs far less than any interior system.
Seal Cracks and the Foundation Wall
With exterior water redirected, the foundation itself is next. Sealing stops specific entry points, but know its limits.
Inject Structural Cracks
Cracks in poured walls are best repaired with professional epoxy or polyurethane injection, which fills the crack through its full depth. Published guides estimate roughly $250 to $800 per crack, depending on length and access. Injection fixes the crack, not the pressure behind it, so it works best where drainage is already sound.
Coatings: Useful but Limited
Masonry waterproofing paints and epoxy coatings, estimated at $1 to $8 per square foot, reduce vapor transmission and minor dampness. They cannot stop pressurized water: hydrostatic pressure pushes water past or blisters off interior coatings. Hydraulic cement can stop a small active leak temporarily, but it is rigid and rarely holds long term. Treat coatings as a supplement to drainage, never a replacement.
Interior Drainage Relieves Pressure
When water keeps arriving despite good exterior management, collect it and pump it out rather than trying to hold it back with the wall.
Interior French Drain and Sump Pump
An interior French drain is a perforated pipe in gravel, set in a trench around the inside slab perimeter, that intercepts seepage and carries it to a sump pit. Estimates run roughly $30 to $150 per linear foot, with a full system plus pump commonly estimated at $4,500 to $10,000. A replacement or new sump pump is commonly estimated at $900 to $1,500. In a finished basement, battery backup is essential: outages arrive with the same storms that raise the water table.
Control Humidity in Finished Space
Even a leak-free basement feels damp if the air stays humid. The widely cited target, consistent with EPA guidance, is 30 to 50 percent relative humidity, with 60 percent as the ceiling above which mold can grow on its own.
Size and Run the Dehumidifier Right
Use a dedicated basement dehumidifier rated in pints per day, matched to the square footage and dampness level, with an anti-frost feature for cool basement temperatures. Set the humidistat to 45 to 50 percent, plumb continuous drainage to a floor drain or the sump pit, clean the filter seasonally, and verify with a separate hygrometer after heavy rains.
Ventilate Only When It Helps
Bathroom and laundry exhaust fans should vent directly outdoors to remove moisture at the source. But opening windows in summer backfires: warm outdoor air entering a cool basement raises humidity and causes condensation. Ventilate only when outdoor air is drier than indoor air.
The Vapor Barrier Mistake to Avoid
Do not install polyethylene sheeting or any Class I vapor retarder on the interior side of a below-grade wall assembly. Building science guidance from the Building Science Corporation and U.S. DOE building science resources warns that it traps moisture migrating through the concrete inside the wall cavity, causing mold and rotted framing. Instead, place rigid foam directly against the concrete and use vapor-permeable interior finishes or a smart vapor retarder so the assembly can dry toward the interior.
Choose Finishes That Tolerate Dampness
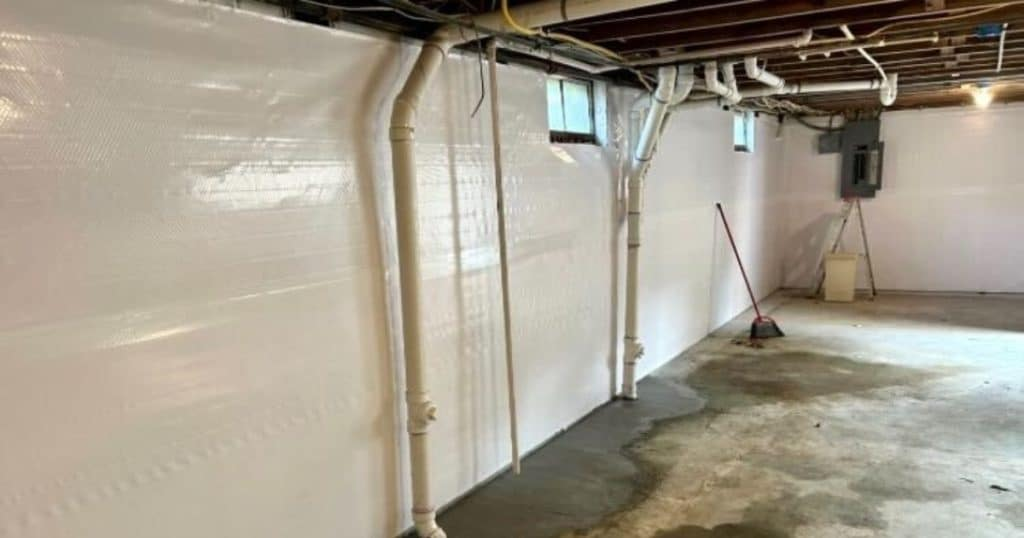
A dimpled polyethylene membrane over the slab creates an air gap and capillary break so vapor dissipates before reaching the finished floor; subfloor panels with a foam or plastic base add a thermal break that keeps floors warmer and drier. Keep absorbent materials off the concrete: rigid foam against the wall, then framing, then mold-resistant drywall. Prefer hard-surface flooring such as luxury vinyl plank or tile over carpet, and use PVC or composite baseboards in the most moisture-prone areas.
Which Method Fits Your Situation
Most finished basements need a combination. Match the method to the source you diagnosed:
| Method | What It Fixes | Relative Cost | Disruption |
| Gutters, downspouts, grading | Surface water at foundation | Low | Minimal |
| Crack injection | Isolated wall cracks | Low to moderate | Low |
| Waterproof coatings | Vapor, minor dampness | Low | Low |
| Interior French drain + sump pump | Hydrostatic pressure, seepage | Moderate to high | High |
| Exterior waterproofing | Water at the source | High | Very high |
| Basement dehumidifier | Airborne humidity | Low | Minimal |
What Basement Moisture Control Costs
Treat all figures as estimates and get itemized local quotes. Published cost guides suggest these typical ranges:
| Project | Typical Estimated Range |
| Crack injection (per crack) | $250 to $800 |
| Interior French drain + sump pump | $4,500 to $10,000 |
| Sump pump install or replacement | $900 to $1,500 |
| Interior waterproof coatings | $1 to $8 per sq ft |
| Full exterior waterproofing | $8,000 to $15,000+ |
Waterproofing before finishing almost always costs less than tearing out and rebuilding a mold-damaged basement afterward.
Common Basement Moisture Mistakes
- Finishing over an unresolved leak. Finishes hide water entry until mold and rot are extensive. Fix leaks and observe through a rainy season before framing.
- Relying on waterproof paint alone. Coatings resist vapor, not hydrostatic pressure.
- Plastic sheeting behind drywall. A Class I interior vapor retarder traps concrete moisture in the wall cavity.
- Undersizing the dehumidifier. A small portable unit cannot hold a full basement below 60 percent humidity.
- Skipping battery backup. Storms that raise groundwater also knock out power.
- Ventilating with humid summer air. Open windows in July raise basement humidity and cause condensation.
- Discharging the sump by the foundation. The pump just recycles the same water back into the system.
Safety and When to Call a Professional
Moisture work in basements carries hidden hazards. Know where DIY ends.
Mold and Air Quality
Wear an N95 respirator, gloves, and eye protection around mold, and isolate the work area. Small surface patches on hard materials are often a homeowner job; extensive mold inside wall cavities or across large areas calls for a professional remediation contractor.
Structural Warning Signs
Horizontal cracks, inward-bowing walls, stair-step cracking in block walls, or heaving floors can signal structural distress. Have a structural engineer or foundation specialist evaluate before any waterproofing or finishing.
Electrical, Sewage, and Gas
Sump pump wiring and new dehumidifier circuits belong to a licensed electrician. Sewage backup is a biohazard, not a DIY cleanup. If work exposes gas lines or requires breaking concrete near utilities, bring in licensed trades.
Final Thoughts
Basement moisture control rewards order: exterior water first, pressure relief second, humidity control third, moisture-tolerant finishes last. A practical next step is to place an inexpensive hygrometer in the basement and walk the exterior during the next heavy rain to see where water actually goes. One storm of observation tells you which method your basement needs first.
Frequently Asked Questions
What is the ideal humidity level for a finished basement?
Aim for 30 to 50 percent relative humidity, never sitting at or above 60 percent, the level where mold can grow on its own. A humidistat set to 45 or 50 percent holds the safe zone with margin for humid days.
Can I finish my basement if it gets a little damp sometimes?
Not until the dampness is diagnosed and fixed. Finishes trap moisture and hide warning signs, turning occasional dampness into hidden mold. Fix the source, verify dryness through a rainy season, then finish with moisture-tolerant assemblies.
Should I put a vapor barrier on basement walls before drywall?
No. Polyethylene sheeting on the interior side traps moisture migrating through the concrete inside the wall cavity, causing mold and rot. Use rigid foam against the concrete and vapor-permeable finishes so the wall dries inward.
Will a dehumidifier alone fix a wet basement?
No. It removes airborne moisture but cannot stop bulk water through cracks or hydrostatic pressure. If a properly sized unit runs constantly without dropping humidity, water is entering faster than it can be removed, and drainage or sealing is needed.
Is interior or exterior waterproofing better?
Interior drainage suits most finished basements at lower cost and disruption. Exterior waterproofing stops water before it reaches the foundation but needs full excavation and typically costs two to three times more. Chronic or severe flooding may justify the exterior route.
How do I know if my sump pump is working?
Test twice a year by pouring a bucket of water into the pit until the float activates the pump. Confirm it pumps down, shuts off, and discharges well away from the house, and test the battery backup the same way.
Why does my basement smell musty but look dry?
Hidden moisture is the usual cause: vapor trapped behind finished walls, damp cavity insulation, a slow plumbing leak, or high humidity feeding growth on dust. Check humidity with a hygrometer and inspect behind access panels and cold surfaces.